Father’s Day gift guide for the outdoorsman

It is almost Father’s Day. I don’t know about you but my father was always hard to buy a gift for — not that he was picky; he just didn’t really need anything. So I always ended up buying him a pair of leather gloves to use for building fence and working our cattle. Looking back, maybe I should have been a more creative shopper because him and mom bought a trailer in their later years and traveled around a bit. So I guess I could of bought him some camping gear.

But before you jump off the cliff, if your dad is an outdoorsman, there are a million gifts that you can buy him. And if you shop wisely you don’t have to spend that much. So let’s go over some of the items you might want to consider for dad.

CAMPING

— Tents. Check out Alps Mountaineering tents.

— Propane camp stove

— Cooking gear. Cast iron skillets, utensils, plates etc.

— Camp Tables. We always are short of tables.

— Cooking setups. They make cool multi-level tables to cook on and hold your cooking supplies.

— Lantern, flashlights. I’ve been testing some Blackfire lights this year that are awesome.

— Tarp(s)

HUNTING

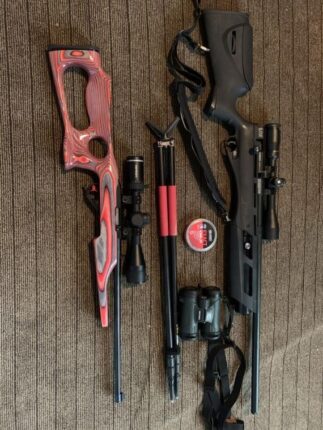
— Knives of Alaska Professional Boning Knife

— Ammo. Ha, if you can find any.

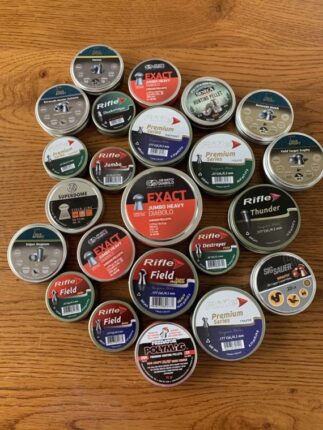
— UMAREX Synergis .22 cal. airgun

— UMAREX .25 cal. Gauntlet

— Knives. Outdoorsmen love knives. Smith’s Consumer Products offers some economical folders.

— Knives of Alaska has some well-designed, high-quality hunting/fishing knives.

— Knife sharpening stones. Smith’s Consumer Products owns the market. Get him a fine diamond stone.

— Calls Turkey (4Play), varmint (FOXPRO), crow, elk and duck calls.

— GRIPSHIELD. Keeps your hands dry for competition shooting.

— Compass

— GPS

— Ruger 10/22 rifle. The 10/22 is the most popular .22 rifle ever made.

— MYTOPO Maps

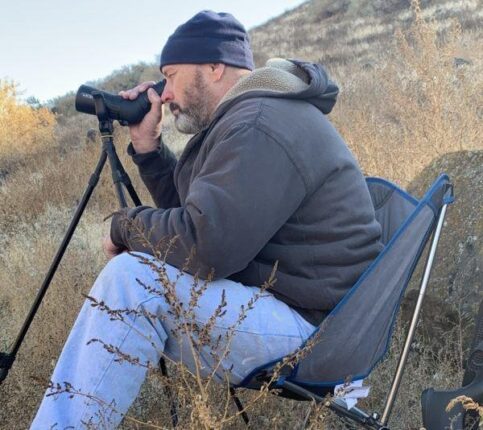
— Riton 10×42 binoculars

FISHING

Fishing equipment can be very specific, depending on what species that he likes to fish for, where he fishes and what time of year. So ask him what he desires or inquire what is popular at a local outdoor store.

— Jigs

— Plastics. Mr. Twister makes good ones.

— Flies. I get mine cheap from flydealflies.com.

— Fishing rod/reel or a fly rod/reel. Ask him what kind he prefers or he might not like it.

— Dip net

— Rat-L-Trap fishing lures

— Frogg Togg rain gear

CLOTHING

Outdoor clothing is a big market and there are some good products on the market.

— HAELEUM Shirts. They offer a multitude of t-shirts that repel ticks & mosquitos. About to start testing them.

— 5.11 tactical pants. They offer a lot of models.

— Heybo fishing shirts. They have cool ones.

— Irish Setter boots. Irish Setter offers lightweight hiking boots on up to tall heavy duty leather winter boots. They also have some nice offerings for wearing in town.

— Hiking socks

— Kryptek. I’ve just started testing their gear but love it. I’ve got a couple of their Sonora Hoodies. They’re like a base layer with a hood.

— XGO base layers

BACKPACKING

— Backpacks. Alps Mountaineering offers a big line of packs.

— Alps backpacking tents

— Alps sleeping bags and pads

— Fire-starting gear

— Aquamira filtered straws and filtered water bottles

— Benchmade Claymore folding knife

— Backpacking chair like the Alps Dash

— Bushnell solar panels

— Backpacking meals

— Adventure Medical Kits

And if you don’t have any money (or even if you do) the all-time best gift that you could ever give him is three free passes that you will go fishing, hunting, camping or backpacking with him. I guarantee you that would be the best gift that you could ever give him.

Tom Claycomb lives in Idaho and has outdoors columns in newspapers in Alaska, Idaho, Utah, Nevada, Colorado and Louisiana. He also writes for various outdoors magazines and teaches outdoors seminars at stores like Cabela’s, Sportsman’s Warehouse and Bass Pro Shop.He can be reached via email at smileya7@aol.com.

A note from Captain Safety

OK, I don’t write many safety articles. In fact, hardly ever. I live a little wild around the edges so I’ve had my fair share of visits to the local emergency rooms. Or as my daughter would say, “Daddy, you’ve never been known as Captain Safety.” So, if I’m writing about safety then let’s just say that the subject matter must be pretty obvious.

So, let’s jump into today’s article. A few weeks ago a reader wrote in about the ground squirrel hunting article and had some comments on gun safety, a topic that I haven’t written too many articles on but it got me thinking. I do see some unsafe acts now and then and wanted to throw out a few words of caution.

There are a few basic rules that if you follow, hopefully you never accidently shoot anyone.

  • Never point a gun at anyone
  • Be aware of your backstop
  • Treat all guns as if they’re loaded
  • Be aware of your target
  • Keep your finger off the trigger until you’re about to shoot
  • It’s smart to carry a pistol in a holster ESPECIALLY Glocks etc. that don’t have safeties

Now let’s expound on a couple of items. I can’t remember all of the details but my nephew had just gotten back from a tour in Afghanistan and/or Iraq and had re-upped. On the way to Washington he stopped by to stay with us for a few days so we went whistle pig hunting.

We were having a big day and had been shooting in the same spot for a good 30 minutes. Suddenly dust started kicking up all around us. Some kid was right over the rise shooting right at us. We hollered for him to stop. After talking to him it all came out. He was shooting from a slight low spot at whistle pigs setting on the top of the rise. Never ever shoot at something on the top of the horizon. He acted amazed that the bullets traveled through the grass and about hit us.

It constantly amazes me how many times I’ll be set up shooting and someone obviously sees you and drives up ¼ mile away and stops and sets up off to left or right basically right in front of me. Don’t think it is safe to shoot if someone is off to the side of your point of impact even 300-400 yards.

Here’s why I say the above. One time two deer were looking at me. They were standing sideways and looking at me with one about 12 to 20 inches behind the other one. The closest doe was about 30 inches forward of the other one. I did a headshot on the closet one and they both dropped. My brother said wow! You got both of them.

I said wait until you see the shot. I knew he thought that I’d done a heart shot and the bullet had passed through and hit the other one but I’d done a head shot and the back doe’s head was 30 inches to the right of the one I’d shot.

After looking at the situation here’s what happened. I shot the front doe and the bullet had hit the jaw bone and bounced off to the right and made a perfect head shot on the second doe. After that I have been scared to take a shot at something I don’t care how far off to the right or left something is in the background. So if someone sets up in front of you just move.

Don’t shoot at anything on a rise or hilltop. You don’t know what is over the hill. You want to set up your targets against a mound or dirt hill so they can’t ricochet off into the wild blue yonder.

The reader that contacted me suggested using fragmenting bullets which is a good idea. But if you’re using solid core bullets beware that they are more likely to skip. Also, if a bullet hits water it can skip as of course if it hits a rock.

Hunting and shooting is a blast but if you ever made a mistake and shot or God forbid killed someone, I can’t even imagine how bad you would feel. We hunt and fish with people we love. It would devastate you for life. I’ve heard second or third hand of people that have shot someone and it screwed them up for life.

As we close, remember the old Winchester saying. “All the pheasants ever bred cannot repay for one man dead.” Have fun but be careful.

Tom Claycomb lives in Idaho and has outdoors columns in newspapers in Alaska, Idaho, Utah, Nevada, Colorado and Louisiana. He also writes for various outdoors magazines and teaches outdoors seminars at stores like Cabela’s, Sportsman’s Warehouse and Bass Pro Shop. He can be reached via email at smileya7@aol.com.

How to clean, store and cook morel mushrooms

Two weeks ago, we talked about mushroom hunting. (A non-hunter may say mushroom picking but to a hunter everything is about hunting. I go to the store to hunt for a pair of boots. Non-hunter, I go shopping. You get my drift.) I said I’d follow up the next week with an article on cooking mushrooms. But those rascally little whistle pigs barged in on the scene and got me side tracked. So, this week, I’ll take back up on the mushroom scene.

But, before we can cook them, we have to clean and process them, right? Morels, and mushrooms in general are fragile so you must be gentle when handling them. That’s why I semi favor carrying a bucket when picking (er, hunting) them even though real mushroom hunters use a mesh bag to let the spores fall out.

When I get home, I gently wash them to remove the dirt and bugs. Then slice them in half from top to bottom and put in a pan of salty water to kill the remaining bugs. Leave them in the bowl over night in the fridge. But this I not a hard fast rule set in stone along with the Ten Commandments. Because I can guarantee you that my girls are going to make me fry up a mess right when we get home. And more than likely their friends will mysteriously show up on cue as well.

To cook if they were soaked overnight as described above, drain off the water. Wait a few minutes and drain again. You don’t really want them waterlogged. Or, if you just got home and have a mess rinsed and split, either way the next step to cook will be the same.

Crack a few eggs in a bowl. Pour in a little milk. Beat with a fork. If you’ve never cooked, don’t actually “beat” the eggs with a fork. Stir them. (Had to throw in a little humor). Sprinkle flour on a plate. Dip the morels into the egg batter and then roll in the flour.

Now throw the morels into a skillet with medium hot grease. You want it hot enough so they bubble when you throw them in but not sizzling hot. Everything fries better in a black iron skillet. Black iron skillets disperses the heat better than a thin-walled skillet.

I think things season better if seasoned while cooking so while frying I sprinkle on regular Tony Chachere’s seasoning. Tony’s is the perfect blend of salt and spices. It is my go-to spice for everything. Fry to a golden brown and remove and lay on a plate lined with paper towels.

Eat while warm. Morels are the best food in the world. Our old friend Jack Sweet used to tell us that morels are the best fungi in the world, second only to the truffle in England. I’ve never tasted a truffle so I’ll have to have that statement proved to me before I concede that there is anything better than a morel.

Fried is the best way in the world to cook them but my old bear/turkey/mushroom hunting buddy Roger Ross mixed some in with scrambled eggs once when we were bear hunting and that was great too. I’ve also had them in cream gravy and that was excellent too.

But what if you get lucky and find more than you can eat in a few days? I don’t know what the exact shelf life is that you can keep them in your fridge but I’ve never kept them fresh for too long. Does anyone know a recommended fresh shelf life?

Jack Sweet said there are a few ways to store them but nothing beats eating them fresh. One year Katy and I got a million and I froze a lot of them. That makes them mushy and is not the best option. The method most people use is to dry them.

You can lay them out on racks to dry in the sun. Or I’ve run a needle and thread through them and hung them up to dry. The buyers lay them out on racks in the sun to dry so of course they’re the professionals.

So drying in the sun is the best method that I know of to store them if you get lucky and find quite a few. Rehydrate them when you’re ready to fry up a mess. Well, happy hunting.

Tom Claycomb lives in Idaho and has outdoors columns in newspapers in Alaska, Idaho, Utah, Nevada, Colorado and Louisiana. He also writes for various outdoors magazines and teaches outdoors seminars at stores like Cabela’s, Sportsman’s Warehouse and Bass Pro Shop. He can be reached via email at smileya7@aol.com.

I love spring in Idaho

Recently, Katy and I were running to buy a pair of boots and then I was going to take her out to dinner. I was thinking about how magical Idaho is in the spring (I know, I know, I say that every spring).

Suddenly, I was singing: “It’s the most wonderful ti-i-ime of the year. There’ll be whistle pigs flipping, the crappie will be nipping, the mushrooms will be growing and the turks will be crowing, it’s the most wonderful ti-i-ime of the year!!!!!”

OK, I’m not a songwriter but springtime is magical in Idaho and less we get tied up mushroom hunting, turkey hunting, bear hunting and crappie fishing don’t forget — whistle pig hunting. It’s one of the highlights of the year. It provides for high-speed shooting and is a great hunt to break kids in on.

There are plenty of them and they are in no danger of being over hunted. They’ve been shot for centuries and are doing fine. In fact, if they are thinned out, they’ll do better because the plague won’t run through their colonies as fast and wipe them out. Farmers will gladly welcome you because they devastate crops. They can wipe out a field of alfalfa in a short amount of time.

So, what is a whistle pig? They are a unique animal. Their official name is Townsend ground squirrel. The subspecies south of us are the Urocitellus Townsendii Idahoensis. They emerge and mate in January/February. Although everyone thinks of them as appearing in mid-April, I’ve had good hunts in early March, according to the weather. But when it gets warm, they are out in full force.

Gestation is only 24 days and they’ll have six to 10 young in April. Their eyes open in 19 to 22 days and are weaned muy pronto. This seems to be their system to me. As stated above, they come out in late January/February and go on a breeding frenzy. Then they go on a feeding frenzy until the end of May/June when it gets hot and the grass dries up. Then they go back underground and that’s the last that you see of them for the year.

Some people think that they go underground and eat plant roots for the next seven to eight months. Some people think that they hibernate. What they actually do is called “estivation.” Sort of a summer hibernation.

You may be fooled into thinking that they are cute little furry creatures but make no mistake, they are a prairie rat. Adult squirrels have been known to cannibalize unweaned young. And while hunting you’ll frequently see them run out and eat their fallen comrades.

Enough of the scientific angle. What will you need to hunt them? Some people use a .223 but most people use the lowly .22. Most shots will be within 100 yards so a .22 is the perfect gun. And the Ruger 10/22 is the most popular model. Since they are small, you’ll need to use a scope. I put a Riton Optics 4-16x on my 10/22 and a Timney Trigger and a Boyds’ Stock to make it super classy. But the .17 HMR is also a popular rifle. It is faster, has better results and reaches out a little further.

But the last 10 years I’ve mostly been using airguns. They’re a lot cheaper to shoot and with ammo being so scarce airguns might be the only option for you. Plus, since they’re quieter they pop back up faster.

I’ve been using the Umarex .25-caliber Gauntlet and the .22-caliber Synergis. They are both super-good choices in the airgun realm. For pellets use JSB Dome pellets if you want supreme accuracy. But JSB just came out with a pellet named the Knockout pellet that looks like a good hunting option. I went out shooting yesterday but the wind was blowing so bad that I can’t testify one way or another as to their accuracy. You’ll also want a good pair of binoculars to find the little elusive creatures. I use a pair of Riton Optics 10×42 binoculars.

I think that the high deserts are beautiful in their own forlorn way. Hunting whistle pigs gives you a good excuse to go out and see them. Plus, there will be unique wildlife viewing opportunities. You’ll see badgers, which I think are beautiful (but the kings of bad attitudes). Once I shot a whistle pig and suddenly a badger ran out, grabbed it and ran back to his hole. Another time my old buddy Roy Snethen shot one. He flipped twice and I said “You got him!” Suddenly a hawk swept down and grabbed him and I said “You had him!”

So, before they go underground for the year you better grab a kid and run out and have some fun!

Tom Claycomb lives in Idaho and has outdoors columns in newspapers in Alaska, Idaho, Utah, Nevada, Colorado and Louisiana. He also writes for various outdoors magazines and teaches outdoors seminars at stores like Cabela’s, Sportsman’s Warehouse and Bass Pro Shop. He can be reached via email at smileya7@aol.com.

On mushroom hunting

If you haven’t ever tried morel mushrooms you’re missing out on nature’s best outdoor treat. Or for that matter, the best food ever since manna dropped down from heaven in the wilderness. I’ve been in the beef business nearly all of my life so I can get good steaks. But for eating pleasure, a morel will rate right up there with a choice ribeye.

There are quite a few edible mushrooms in the Northwest Pacific but I’m not comfortable picking more than a few varieties. I took a mushroom class but still don’t feel comfortable venturing out of my comfort zone. If you make a mistake and pick the angel of death, well, let’s just say that you and God had better be pretty good friends!

So now that I’ve scared you spitless, let’s proceed. The first season you ought to go mushroom picking with an experienced old timer and have them show you the ropes. They may be able to help you identify morels, shaggy manes, cauliflower, puffballs and calf brains mushrooms.

The good news is morels are easy to identify. The only thing that I’ve seen that even remotely resembles a morel is the snow morel/false morel. But again, make sure that you go with an old timer the first season.

The growing season on morels is short. I’ll say something like a one- to two-week period max. They’ll pop out earlier at lower elevations and then you’ll find them later up higher. The magic formula for them popping out is for the soil to be moist and have a warm night or two.

I’m sure if you did a scientific study, you’d discover that their growth is triggered at a certain soil temperature. I find them up where I bear hunt around May 10 at 5,200-foot elevation. Of course I’m up there baiting from April 15 to June so I keep checking until the season hits.

It seems they jump out overnight. I’ve always threatened and maybe I’ll do it this year and that is to find a small one and put a marker by it. Then come back the next day and see if it’s grown 2 to 3 inches.

You want to be checking for them early and not be on the tail end of the season. Nothing is more disheartening than to find a good mess and they’re on the downhill side and deteriorated and you can’t eat them. So, it’s better to be early and barely find any than to be late and only find rotten ones.

So where do you find them? Ha, that’s the million-dollar question. I’ve hunted them for decades but still don’t have it all figured out. Everyone will tell you to look by old rotting logs. Well, there are a million old rotting logs in the forest and the majority of them don’t have mushrooms. Some people say to look under tamaracks. I seem to find them randomly. But there are some likely spots.

They’re not in a bog hole but I have a good spot that is a little bit of a hole which caused it to be moist. Along old logging roads. Especially on the sidebank above the trail. Last year’s logging operations where the ground is tore up. Check in old Caterpillar tracks (bulldozers not the caterpillar bug. Their tracks are too small).

Over the years as you find them go back to those spots. Not that it’s a hotspot every year but many times they are. When you find one on a hillside look up and downhill. Spores wash downhill and many times you’ll find more.

But now and then I find them in weird spots. Years ago I found a bunch on a grassy hillside. I’ve looked there every year since and never found anymore there.

But the absolute most magical spot is in last years forest fire areas. But the second year the burn has lost its touch. You can go to the Forest Service and get maps of old burn areas or pay attention to fires this summer and go back next spring.

I’m not sure if the fires need to reach a certain temp or what but a couple of years ago, I was up bear hunting and found where a random fire had run through the forest. It was a spotty little fire and I thought great! Nobody knows about this spot. But I didn’t find one mushroom in the burn. Weird.

But some years you’ll find clumps big as a cow pie. I remember at one fire years ago two of us couples picked two 5-gallon buckets each in no time at all and had to step over a million on the way out.

It about killed me passing clumps of eight to 12 nice healthy morels.

Uggh, we are out of room. I’ll try to do a mushroom cooking article next week.

Tom Claycomb lives in Idaho and has outdoors columns in newspapers in Alaska, Idaho, Utah, Nevada, Colorado and Louisiana. He also writes for various outdoors magazines and teaches outdoors seminars at stores like Cabela’s, Sportsman’s Warehouse and Bass Pro Shop.

Bear hunting with the spotting/stalking method

Last week we talked about baiting for bears. This week we’re going to talk about the spotting/stalking (S/S) method. So why would you want to S/S instead of baiting?

1. Some units don’t allow baiting.

2. You don’t have any free time to bait.

3. You’re an out-of-stater so it’s not possible for you to bait.

4. Because it’s a cool way to hunt and it works.

What you’ll need

If you’re going to be successful at S/S then you’re going to have to have the proper equipment. Years ago, we saw 10 bears in two afternoons. I only saw one bear before Ed Sweet and Gary Kirkpatrick because I only had some mediocre 8×42 binoculars. They had some high-dollar spotting scopes. To be successful, you have to have good glass. That doesn’t mean that you have to buy $2,400 binocs and $2,500-$3,500 spotting scopes but you don’t want a set of Blue Light specials either.

Here are a couple of decently priced optics that you should be happy with. I use Riton Optics X5 Primal 10×42 HD binoculars. They seem almost as crisp and clear as my $2,400 European binoculars. I used to recommend 8x binocs but you just miss too much game so carry 10x.

Just last year I started testing a Lucid Optics SC9 9-27x 56ED spotting scope. It is a sweet little, lightweight spotting scope. It’d be nice to have a 45x or 60x spotting scope but they are so bulky and heavy that you just won’t end up carrying them. So I’d recommend a smaller, more compact spotting scope.

And then you’ll need a lightweight tripod to set your spotting scope on. (You can also use the tripod for shooting sticks.) Some of the tripods that I’ve tested weigh more than a BIG spotting scope. Gee, they are stout enough to set your house on. Again, if they’re that heavy you just won’t end up lugging them up a mountain.

Then to carry all of the above gear plus your water and snacks you’ll want a medium-sized backpack. I tested out the Alps Mountaineering Ghost and Baja 40 backpacks last year and they should work fine.

How to S/S

Now that we’ve covered what gear you’ll need, let’s cover how to S/S. In early spring bears will be coming out of hibernation. After fasting all winter their stomachs are tender and they’ll be eating grass and flower tops.

You’ll see them at dusk feeding on hillsides like deer (in singles). They’ll be out grazing at the snow line. When I say at the snow line, that doesn’t mean within 2 feet of the actual snowline but somewhat following it.

I don’t know the name of the flowers but they like eating the top off of the yellow flowers. I remember one year I went back up after season to film some bears. I saw one and he was ripping into the grass faster than a grazing cow. It was a weird deal. I got within 17 paces of the bear and figured that was probably close enough so I stopped and snapped a pic with my 35mm Canon. At the sound of the click, he spooked. I think that I could have walked up and slapped him on the rear.

So what you’ll want to do is after work run up to the mountains and hop up on top of a ridge where you can get a good view and set up your spotting scope. How to properly glass is a whole article in and of itself but briefly, set-up and take a pad or an Alps Mountaineering Dash chair to set on. If you’re not comfortable then you aren’t going to be able to glass too long.

You need to have a glassing system. Scan across the opposite ridge. Get to the end and drop down 50 yards and scan back to the other end. Repeat, repeat to the bottom of the mountain. Wait a few minutes and repeat. Bears will feed in and out of cover.

They’ll come out a little bit before dusk so you don’t have too long to find one and sneak up on it.

When you see one, you’ll have to formulate a game plan fast. Is he the bear you want? Is it a sow with cubs? Is it moving along too fast for you to be able to get to? If it is too far to get to before dark you may have to move over the next evening and set up closer. If there is good grass, he should be in the same vicinity tomorrow.

If he’s the bear you want mark where he is. Is there a tall burnt tree near him? A patch of white flowers? When you get over there the area will look a lot different than from where you were. He may be hard to find.

There is so much more to cover but once again, we are out of room. Good luck. Spotting/stalking for bears is a blast. Have fun.

Tom Claycomb lives in Idaho and has outdoors columns in newspapers in Alaska, Idaho, Utah, Nevada, Colorado and Louisiana. He also writes for various outdoors magazines and teaches outdoors seminars at stores like Cabela’s, Sportsman’s Warehouse and Bass Pro Shop.

Bear hunting with bait

I don’t know why but bear hunting has always intrigued me. Maybe because of the element of danger. Maybe because no two hunts are the same or maybe because after a long, hard winter it is the first big hunt of the year (other than cougar and varmint hunting). Or maybe because it’s a good reason to get up into the mountains.

But for whatever the reason, I love bear hunting. Anymore, I don’t really care to shoot one. In fact, I don’t think I’ve shot one since 2016. I only shot those two because I’d just gotten a cool Golden Boy Henry’s 45-70, which is a brass lever action. It looked super cool in the picture with my cinnamon bear.

And then I shot a big brown bear up in Alaska. I wanted to make a batch of bear sausage so that’s why I shot the black bear. Anymore, I just like baiting and watching them or taking kids or new hunters. They get so excited that it is as much fun as hunting myself.

There are basically three ways to bear hunt:

1. With hounds. If you’re hunting with hounds, you’re either hunting with a guide or a buddy. Since you’ll be playing by their rules, I won’t cover this one.

2. Baiting. This is a fun way to bear hunt. If you learn how to bait properly you’re in control of the game. I’ll explain more below.

3. Spotting/stalking. This is a fun way to hunt.

Only nine states allow baiting for bears and Idaho is one of them.

If you bait, you have time to study your bear. Is the hide rubbed? Is it the size and color phase that you want? Is it a sow with cubs? If you’re out hiking in the woods, you might have the tendency to shoot as soon as you see one before it gets away and then discover that it was a sow with cubs. When baiting, that is not the case. You have time to study the bear and see if it has cubs.

The only time that I nearly shot a sow with cubs was years ago when I was hunting on a river with a salmon run. A buddy wanted a bear skin and I just wanted the meat. So I told her that I’d give her the hide.

On the last day of the hunt, I saw a decent sized bear and studied it for a bit before deciding to shoot it. Finally, I hit the safety but suddenly a cub walked out. I watched her take the salmon up in the brush and everyone lived happily ever after. If I had of been baiting, I wouldn’t have been so rushed. So baiting is a great way to bear hunt and ensure that a sow with cubs is not shot.

Also, it helps the bear population if a few big boars are shot. One year, I set out my bait and then went turkey hunting all day. At dusk, I went down to check my bait, to see if by chance a bear had come in. Halfway down I saw two bears on a slope 75 yards a ways. I notched an arrow and suddenly a cub jumped up the tree by me.

Uh-oh, that had to be a sow and cub up the hill. Nope, here comes a sow off to the right. I’d stepped between a sow and three cubs. Not good. Luckily got out without having to shoot her.

The next day maybe 700 yards from that spot I was going down an old, old logging road and stepped over a big yellow pine that had fallen over. A 1½-year-old cub was laying there with its nose under the log.

I thought it was asleep and poked it with an arrow. I finally figured it out. It had to have been one of the three cubs that I’d seen the night before. A big boar had obviously killed it so the sow would recycle and breed. Big boars kill cubs. So, shooting them actually increases the bear population.

To bait, use a barrel. That way bears can’t run in and gorge or drag bait off in the brush to eat. They’ll set there for 30 minutes feeding. Chain or strap your barrel to a tree or the rascals will drag it off.

Everyone has their secret bait but the truth of the matter is, you’re going to use whatever you can get large amounts of. When multiple bears get hitting your bait hard, they’ll clean out a barrel in two to three days.

Meat is fine and I’ve hauled tens of thousands of pounds of meat to the mountains but there are better options. After a long hard winter of fasting, meat is tough on their stomachs. Donuts are like crack cocaine to them!

Hang up a scent bag. This way you can have multiple bears coming in. Anyone can get one bear hitting the bait but what if it isn’t a big one? You want six bears an evening hitting your bait. That’s when it gets exciting.

Uh-oh, we’re out of room. We’ll continue spring bear hunting next week.

Tom Claycomb lives in Idaho and has outdoors columns in newspapers in Alaska, Idaho, Utah, Nevada, Colorado and Louisiana. He also writes for various outdoors magazines and teaches outdoors seminars at stores like Cabela’s, Sportsman’s Warehouse and Bass Pro Shop.

Airguns 101: Part IV

This week we’re going to wrap up the four-part series on airguns. This article will be a wrap-up/summary on airguns.

If you need further convincing that airguns have hit the modern shooting world with a big splash and is not just a fizzling fad among a group of old senile bald-headed men looking for a new source of entertainment, check out the offerings at your favorite outdoor store. Or go online and look at all of the airgun offerings. I’ve heard there is a new airgun company that opened up at the old Nampa Rod & Gun Club in Nampa. I have to go check that out. Or check out Pyramyd Air, which is a large online airgun store.

Or check the true litmus paper — the free market. I test a lot of airguns, sponsored on hunts and conduct seminars by airgun companies. You’d think I knew all of the airguns companies out there but I learn of a new company every time I open a catalog. If airguns weren’t popular, then why would so many companies be jumping on the airgun bandwagon?

So let’s get started. We’ve learned that there are three good platforms to choose from.

1. CO2

2. PCP (Pre-charged Pneumatics)

3. Break barrel (BB)

They are broken down into these three classifications due to their power source. You’ll have to choose which one works best for your desired application. To help you make a decision here are my thoughts.

What I am about to say is not totally true but generally is.

1. CO2s — good to train kids. They’re not as powerful so you can set up a shooting range in your garage with the proper backstop and targets.

2. Break barrels — These are the most economical, the most powerful and a great option for hunting. If you get a mid-priced BB like the Umarex Synergis (yes, it is an under lever but I’m putting it in the break barrel category), you will have a shooter that is accurate and powerful enough for small game hunting. If you buy a BB with a magazine then you’re not digging pellets out of your pocket every shot. But, over time you will have malfunctions with the plastic magazines so you preppers may want to go with the single shot BB. Although you can still slip in a pellet by hand.

3. PCPs — are the most expensive to shoot due to the fact that you’ll need auxiliary air tanks, pay to fill them, etc. I’d suggest buying a Umarex Readyair Airgun Compressor. It’s the most economical air compressor that I’ve found. I have no doubt, in due time if you really get into airguns, that you’ll end up buying a PCP. The .25 cal. Gauntlet has an MSRP of $329.99 and has worked great for me. The Marauder has an MSRP of $539.99. But if you want to burn money you can blow up to nearly $3,000. I just can’t afford that plus, I get super groups out of the above two PCPs so I don’t know what more those expensive ones could bring to the party?

SCOPES

I didn’t touch on scopes in the other three articles. In the old days every one told you that you had to buy airgun compatible scopes, that due to the unique recoil of an airgun that they would break a regular scope. I think this applies to BBs but not the other two models. But still, to be safe check before you buy a scope for your airgun. A lot of the cheaper airguns come with cheap scopes. So you may want to upgrade your airgun scope.

Since we’ll be shooting small game with a small kill zone, you’ll want at the very least a 3-9x but a 4-16x is better. I’ve found Riton Optics scopes to be economical and yet they have a crisp view.

PELLETS

As covered in the last airgun article, if you want tight groups you have to use good pellets. JSB is the best. If you’re plinking and flinging out hundreds of pellets per day, I’ve had good luck with Crosman and Sig Sauer pellets.

SAFETY

As my daughter would say, “Dad, you’ve never been known as Captain Safety,” but despite the voices of the haters, I want to throw out one word of caution. I don’t want to make you paranoid but I think that it would be prudent to take a jug of water and periodically wash your hands since you’ll be handling lead pellets. And for sure wash before you eat or suck your thumb if you’re so inclined to thumb sucking.

I don’t have any data to support this paragraph but I think that it only stands to reason to do this.

Tom Claycomb lives in Idaho and has outdoors columns in newspapers in Alaska, Idaho, Utah, Nevada, Colorado and Louisiana. He also writes for various outdoors magazines and teaches outdoors seminars at stores like Cabela’s, Sportsman’s Warehouse and Bass Pro Shop.

Airguns 101: Part III

As hunters, we all know that we have to experiment to find which ammo shoots the most accurately in our big game rifles, right? We check different manufacturers, grains of bullets and designs.

A while back, I was setting up a Mossberg Patriot Revere .30-06. I mounted on a Riton RT-S MOD 5 4-16×50 WIDE FOV scope. I planned on this set-up to be a shooter.

But after testing several brands of ammo, I still couldn’t get the results I wanted. Finally, after testing 13 different manufacturers and grains of bullets, I got what I wanted.

We know this on our firearms but something that surprised me was that it is just as important to test various manufacturers, shapes and weights of pellets if you want your airgun to shoot accurately.

Like I said in the first article in this four-part airgun series, in the beginning I could not get better than a 1½-inch group at 15 yards. Finally, I got some good airguns and my groups improved immensely, but my quest for accuracy was not yet complete.

With airguns, we’re hunting small game that has small kill zones, so it’s imperative that we get superb accuracy out of our airguns. In my quest for accuracy, I then learned that which pellet you choose is as important as buying an accurate air rifle. You just cannot get a good group with substandard pellets.

As an outdoors writer I get to test a lot of pellets. Luckily I met the JSB crew at the SHOT Show and everything fell in place. From what I’ve tested, JSB hands down makes the most accurate pellets.

Sig Sauer splits the 2/3 place with Crosman. Now we were cooking. Good gun + good pellets = hitting the mark.

Why does accuracy vary so wildly between manufacturers? Here’s my theory. One air gun company in particular makes super lightweight alloy pellets. That way they can boast speeds of up to 1,450 feet per second.

They may travel along fast … you just don’t quite know where they’re traveling to! They are highly inaccurate. So what good is speed if you don’t hit where you’re shooting? Remember: Accuracy trumps speed.

I don’t know why but the Diabolo (actually the dome shaped, which I guess is a Diabolo hybrid) shoots the most accurately for me. Looking at them you wouldn’t think that they are aerodynamically stable but they say the skirt stabilizes them in flight. I don’t know. I’m not an engineer; I just know what shoots best for me. One last comment on this point. I’ve found that whatever pellets shoots the most accurately for me in one gun does so as well in my other guns. So pellets one, two and three rate the same in all of my guns.

You may ask, what about the polymer-tipped pellets? You’d think with the point they’d fly faster, be more accurate and penetrate better thereby having better killing properties. I agree. But that’s not totally true. Again, the dome-shaped Diabolo pellet is the most accurate design.

Now to address better killing properties. Yes, I’d have to assume and agree that the polymer tip will penetrate better than a flat-nosed pellet. Although I never have tested both on gel to see how well each penetrates. But the problem is, all of the polymer-tipped pellets that I’ve tested aren’t as accurate as the Diabolo shaped pellets. So what if they penetrate better if they don’t hit in the kill zone?

Again, accuracy trumps all.

Another downfall of the polymer-tipped pellets is that they won’t work in airguns that use a magazine. They protrude out too far and jam up. Used to, this applied only to the CO2 and PCP airguns. They’d work fine in break barrel airguns but now more and more manufacturers are offering break barrels that utilize a rotary magazine. I commend the industry for experimenting and trying to make new designs but the polymer tips just aren’t fitting into my world.

What about the semi-hollow point pellets? I haven’t done extensive testing on them so this is just my gut feeling. I don’t think that an airgun spits out pellets fast enough to make a hollow point perform and expand like they do in your trusty ol’ 30-06. Although, I took the Umarex .50 cal. Hammer axis deer and hog hunting last year. I dug the bullet out of the axis deer and it had mushroomed and performed great.

I’m going to have to test the hollow-point wannabees in the smaller calibers before you take what I’m saying as the gospel.

Moral to the story: Shoot good pellets or you’re going to get frustrated with the inaccuracy of your airgun.

Tom Claycomb lives in Idaho and has outdoors columns in newspapers in Alaska, Idaho, Utah, Nevada, Colorado and Louisiana. He also writes for various outdoors magazines and teaches outdoors seminars at stores like Cabela’s, Sportsman’s Warehouse and Bass Pro Shop.

Airguns 101: Part II

As we continue our quest into airguns today, let’s talk about what model to get. There are three popular models of airguns. Let’s cover those and try to decide which one would best meet your needs.

They are broken into three groups depending on their power source.

CO2

CO2s derive their power from a CO2 canister that you insert into the gun. The bad deal with CO2s is that as the pressure drops, so do your pellets/BBs.

Most CO2s only spit out pellets at 600 to 800 feet per second, so not really a viable option for hunting. I assume so as to conserve power, most of them are .177s. So why even buy a CO2? Well, they do serve two purposes that I can think of.

1. If you want to run pests out of your garden such as deer but don’t want to kill them, CO2 BB guns are great for that. Plus as far as I know most all of them are semi autos so you can scatter a whole herd of deer.

2. If you have small children that you are wanting to get into hunting and shooting they are the best choice. It takes someone strong to work a break barrel and PCPs are expensive.

Sig Sauer makes CO2s that mimic their real firearms, which makes them great for training (smart idea). I teach a lot of Airgun 101 seminars. I was conducting one last year in Reno at the Safari Club International convention. A lot of grandads and dads who want to get their kids into hunting and shooting bring the kids to my seminars. I had the Sig MCX on my demo table. It looks, feels and has the same features as the real SIG AR. As you can imagine, all of the kids were telling grandad to buy them an MCX.

CO2s are great for getting kids into shooting. Sig makes a lot of cool targets. Spinners, flippers, shooting galleries, etc. So if your kid doesn’t want to hunt but wants to shoot or plink tin cans, CO2s are the ticket.

BREAK BARRELS (BB)

BBs are the most popular model and for good reason. Some boast speeds of 1,450 fps; remember, a .22 only flies along at 1,250 fps. So they’re a good choice for hunting. They’re also the cheapest to operate. Break the barrel, insert a pellet and you’re good to go. Preppers like these.

BBs get their power by compressing a spring or a cylinder usually filled with nitrogen. They have a unique recoil. They kick backward and then forward. To get any degree of accuracy, you need to use the “artillery hold.” Hold it tight as normal with your strong hand but only cup your off hand and set the forestock in it. Let it slide backward and forward when you shoot. Hold your off hand in the exact same spot every time or it will affect your point of impact.

With a BB you can shoot pellets with polymer tips. PCPs and CO2s use magazines and the polymer tips jam up in them.

The major pain with hunting with a BB is that every shot you have to dig in your pocket, open a can, pull out a pellet and load it. I have a small canvas pouch that I can dump pellets into which does speed up the process immensely. But, a few companies have come out with air rifles that utilize a rotary magazine. This is great. Buy two to three extra mags and you can hunt and shoot high speed.

PRE-CHARGED PNEUMATICS (PCPs)

These are my most favorite air rifles because they’re the most accurate. I get 3/16-inch groups with some of mine. So they are the ultimate hunting airgun. They don’t travel as fast as a BB, most of them probably 900-1,100 fps but accuracy trumps speed.

They are powered by compressed air, which is stored in a tank on the gun. Most of them will hold 3,000 pounds per square inch. Yes, I said 3,000 psi, not 30 psi like your truck tires. That’s some serious air pressure. The PCP regulates the air for each shot so whether your tank has 3,000 or 1,800 psi it shouldn’t affect the trajectory of your pellet.

PCPs are also the most complicated of the airgun family. To charge one you must have an external air tank. These cost about $350. Not that it is expensive but to fill the tank you have to run to a skindiving shop and pay them $6-$8. This can be inconvenient as you have to work around their schedule. Plus, on a busy day of shooting I’ll go through two tanks in two-thirds of the day. So if you’re hunting with one, you’ll want two tanks.

You can buy hand pumps that resemble a bicycle pump but they’re major pain to operate. Let’s just say — if you go this route, you can cancel your gym membership!

But, have no fear. Umarex saved the day. They have a compressor called the Umarex Ready Air which you can plug into a 110 outlet or to your truck battery out in the field.

Well, once again we are out of space before I am out of words, but we had better knock off or the editor will have to cut the obituaries for this week.

Tom Claycomb lives in Idaho and has outdoors columns in newspapers in Alaska, Idaho, Utah, Nevada, Colorado and Louisiana. He also writes for various outdoors magazines and teaches outdoors seminars at stores like Cabela’s, Sportsman’s Warehouse and Bass Pro Shop.