The all-American gun

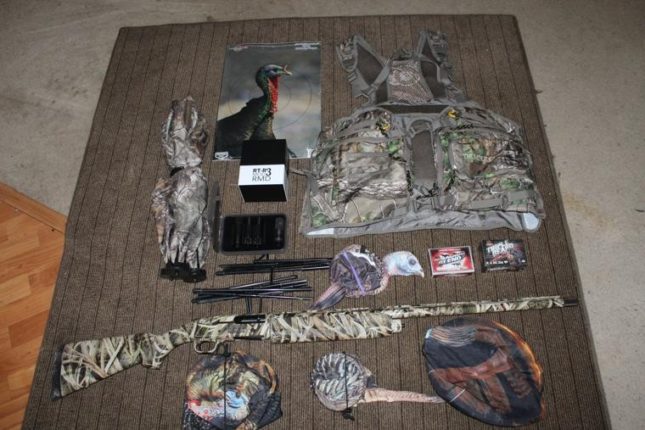
Blackfoot is as much my home as Pocatello, because my mother and father grew up there, as did most of my aunts, uncles and cousins. My generation is pretty spread out now, throughout Washington, Idaho, Arizona, Oklahoma and Texas, but we all manage to get back to Blackfoot as often as we can.

Whenever I am in Blackfoot, I like to stop in at Rupe’s for lunch. Rupe’s used to be one of those drive-in hamburger joints where waitresses on roller skates would come out and take your order and then bring it to you and hang it all on the window of your car. You can still do that if you like, but the waitresses just walk out and take your order, and there is also a pretty nice restaurant in the building now.

My favorite meal at Rupe’s is their All-American Burger with a chocolate milk shake.

That got me to wondering, if there was an All-American Burger, why isn’t there and all-American gun? And if there were, what would it be? A case could be made for any number of guns that have some historical value to most Americans.

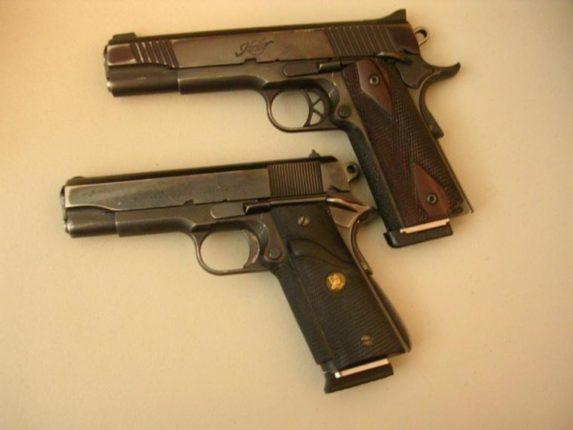
As I thought about it, I decided that the Colt 1911 .45 ACP is what I think of as the all-American gun. As a matter of fact, I own two of them, a Commander and a Government Model.

During the Philippine-American War, from 1899-1902, the Army’s .38 Colt long revolver proved to be ineffective at reliably stopping Moro warriors in combat, and the Moro warriors were able to get with in striking distance of U.S soldiers with melee weapons even after being shot.

Existing supplies of the old Colt single-action .45 revolver and ammunition were issued to U.S. troops and the skirmishes with Moro warriors took a dramatic turn in favor of the U.S. troops.

After the war and several modifications, John Browning’s M1911 semi-auto design was accepted as the new official handgun of the U.S. Army. The new 1911 fired the now familiar .45 Automatic Colt Pistol round that rivaled the old .45 Colt round in most respects.

For over 100 years, that pistol and caliber have traveled with American troops into almost every crisis, hot spot and war the United States has participated in. It immediately earned the name The Yankee Fist among foreign countries that were issuing their own militaries 9mm semi-auto pistols.

The 1911 proved to be an effective and powerful weapon in the hands of U.S. expeditionary forces and was available to U.S. troops during the first World War and was still the issue side arm for U.S. troops during World War II.

During World War II, several American factories, including Colt, Remington, Singer and Ithaca, were called on to manufacture 1911 .45 Automatic Colt pistols for not only American troops but those of our allies also. Over all, 1.9 million 1911s were produced during World War II.

Almost from the time the 1911 became the Army’s standard-issue pistol, it was available to the general population, as well as criminals such as John Dillinger and others.

The late Col. Jeff Cooper, USMC retired, and the owner of Gunsite Academy in Paulden, Arizona, has emphatically declared that, “If you want to win, this is the gun you will carry,” while holding up a Government Model 1911 in .45 Automatic Colt Pistol.

Although the 1911 design is more than 100 years old, John Browning was way ahead of his time when he conceived the design and had Colt build the pistol. The new generation of polymer, striker fired pistols may be easier to disassemble and have larger magazine capacities owing to staggered loading in the magazine, but they can’t honestly claim better ruggedness or more reliability than the Browning designed 1911. People with smaller hands such as myself find that the 1911 fits our hands more comfortably than the polymer guns, which have larger grips and triggers that are harder to reach.

The 1911’s record as a bucking hand cannon is over-stated. Recoil is really more of a push than a hard snap to the rear if fired with the recommended stiff wrist. The action of the 1911 was designed to work off of a stiff wrist. Recoil is 7.5 foot pounds, which I have found I can teach almost anyone to be in complete control of for quick follow up shots.

Although the standard U.S. sidearm is now a 9mm for more uniformity with NATO troops world wide, the U.S Marines recently ordered twelve thousand Close quarter Battle Pistols (M45A1). The M45A1 is a 1911 built by Colt Defense with modifications such as a Picatinny accessory rail, night sights and a desert tan paint job. The pistols were distributed to both U.S. Marine Corps Forces Special Operations Command (MARSOC) and Special-Operations-Capable Marine Expeditionary Units.

In 2014, the U.S. Army announced they were holding trials for a pistol to replace the current M9 pistol, and I had hopes that the Army had come to its senses and would again adopt the 1911 as its standard issue pistol. However, two of the requirements were the pistol had to be modular and have very low recoil. The Army went on to select the Sig Saur 320, which is certainly a better built pistol than the M9, but it is still a 9mm, which many think is not powerful enough. Because it is modular, I suspect some of the troops will opt for the .45 Automatic Colt pistol caliber for specific operations.

Today, the 1911 still lives on in the hands of Marines and private gun owners everywhere.

Smokey Merkley was raised in Idaho and has been hunting since he was 10 years old. He can be contacted at mokeydo41245@hotmail.com.

Whistle pig five-fecta

Springtime in Idaho is magical. We have a flurry of outdoor activities. Bear hunting, turkey hunting, mushroom hunting, crappie fishing and, last but not least, whistle pig hunting! I love whistle pig hunting.

How can you not? It’s a low-key hunt, there’s a ton of shooting, and it’s a great hunt to start kids on. The last few years, I’ve written articles on the top three whistle pig guns and titled it “The whistle pig trifecta.”

I’ve been swamped this year with seminars and articles and have not gotten to whistle pig hunt as much as normal. Don’t get me wrong; I’ve gotten out, just not as much as I want. Now, I leave for Texas to hog hunt with a Caracal .300 Blk., Riton Optics scope, Puma SGB knives and Roxor quads. In the spring, even with extended daylight, there are still just not enough hours in the day.

But back to the trifecta. What is it when you have five guns instead of three? Is it a five-fecta? So with that, here are my top five guns I’ll be using this spring.

BENJAMIN MARAUDER

Don’t discount airguns as a good choice. They’re quieter, so whistle pigs pop back up faster, and they’re safer because they don’t skip across the prairies like others might. I use a .22 cal. as opposed to a .17 because they have better killing power. You’ll want to use high-quality pellets to obtain maximum accuracy. I’ve had good luck with their Premier Ultra Magnum Hunting Pellets and hit one last week at 66 yards. My Marauder is my most accurate airgun.

RUGER 10/22

Hands down the 10/22 is the most popular .22. No doubt in part because of the amount of after-market accessories available. I put a Boyd’s stock, Brownell’s bull barrel and a Timney trigger on mine (the only original part is the action). You’ll want to carry at least two 25-shot clips because when the shooting is hot and heavy it will feel like you’re only carrying five-shot clips.

This spring, I’ve been testing Federal Champion ammo and getting 1/2- to 3/4-inch groups, but with the CCI Mini-Mag .22 LR SHP ammo, I got a .15-inch five-shot group recently. That is as good as I get with Eley ammo, which costs five times more.

HENRY LEVER ACTION .22 WMR

How can you not love a Henry .22 Magnum? Forever I’ve wanted a lever action .22 since jack rabbit hunting with a buddy who had one 40 years ago on the deserts by El Paso. But I’ve also wanted a .22 Magnum, so I opted instead for a .22 Magnum instead. In a pinch, I can even shoot hogs with it.

I’m using Federal 50-grain Champion ammo. I haven’t shot open sight in 100 years, so any inaccuracies are because of my lack of skills, but surprisingly with the Skinner sight that it came with I am getting some good groups and it’s performing great on whistle pigs.

MOSSBERG M817

Ever since the .17 HMR was introduced at the SHOT Show a few years ago, it has been a barn burner.

So for this spring I’m throwing in the Mossberg M817. Because I was going to be shooting small targets, I mounted on a Riton Optics 6-24×50 Scope. It is an awesome scope. It’s an adjustable objective scope, which is great because I’ll be shooting from 10 feet out to 150 yards.

For hunting this spring, I’m shooting CCI A17 Varmint Tip ammo. In case you wonder why people love the .17 HMR, CCI ammo zips along at 2,650 feet per second with their 17-grain bullets. That’s smoking hot.

CARACAL CAR814 A2 PATROL .300 BLACKOUT

You may think a .300 Blackout is a bit of an overkill, but in case I run into any mutant whistle pigs, I’m ready! OK, truth be known I’ve got a loaner Caracal to test on a Texas hog hunt, and I thought it’d be fun to also test it out on whistle pigs. At the SHOT Show, I stopped by the Caracal booth and told them about the upcoming hog hunt and Jeffery persuaded me to check out his .300 Blk. I immediately fell in love with it. It is a sweet shooting little gun. With their 30-round clips, I am ready to send multiple hogs to hog heaven.

I will be hunting with Slow Glow so I should be getting 10- to 20-yard shots, so I mounted a Riton Optics 2-7×32 on it. I’m only shooting at 20 yards but am getting down to .2 groups (Kicking out a flier) using Nosler Ballistic Tip 125-grain BT ammo. This will also be fun to hunt whistle pigs with.

Well, enough writing. Whistle pigs are attacking school kids at bus stops. It’s time to go out and do our civic duty and protect them!

Turkey hunting season is around the corner. Are you ready?

There are some rabid turkey hunters out there — and I’m not just talking about in the Deep South where they have large numbers of birds and have hunted them for generations. I’m also talking about out West.

The big number of turkeys here in Idaho is a huge success story because of the combined efforts of the National Wild Turkey Federation and the Idaho Fish and Game. While we may not have the big numbers like I’ve seen down in the southern states, that doesn’t mean there aren’t enough to get excited about. Plus, down there, you’ll be hunting on farm ground. Out West, we have the opportunity to hunt them in the mountains, which gives us a unique twist.

I think being able to hunt them up in the mountains makes a turkey hunter get as excited as an elk hunter. I don’t want to say it is the exact same, but you are in the mountains, you set up decoys and try to call in a lovesick tom. You’re up before daylight setting up close to a roost that you had to scout to find. There are a lot of similarities to elk hunting.

So how do you hunt them? I’d recommend having a jake decoy and a couple of hens. For calls, I’m old school and still like the old box calls. I use a Quaker Boy Hurricane call.

A ton of turkey hunters like the slate plates, and push-boxes are popular, too. A 6 year-old kid can master a push box in minutes and be effective. You can also tape them to the forearm of your shotgun and operate them as you are leveling down on your gobbler. You also need to learn to use a reed.

Sights

I’ve never used a scope or red dot sights while turkey hunting (I know, I know, I’m old school), but with the turkey loads that they have now that can reach out to 60-plus yards, you need one. I just got a Riton Optics RT-R Mod 3 RMD red dot sight.

Ninety-nine percent of new turkey hunters think they just have to aim and shoot. It’s a shotgun, right? Wrong! I’ve never measured one, but let’s say a turkey stands 3 feet tall and you’re using some good turkey loads and a turkey choke. You need to aim at a body part just like if you were deer hunting.

Decoys

They make some really cool realistic turkey decoys. The bad thing is they’re expensive and heavy to carry. If you’re hunting on the Boise River maybe you can use them, but if you’re running and gunning in the mountains then you need to use Montana Decoys. They’re super lightweight. I like a lot of their offerings but check out their Spring Fling, Jake Purr-FECT, Miss PURR-FECT and Fanatic.

Shells and chokes

I wrote for Bass Pro Shop for more than three years, and once they had me test nearly all of the turkey loads out there. Hands down HEVI-Shot is the best, and they have a new offering they call the HEVI-X Strut that I’m about to test. But you must use a proper choke. Check out Trulock chokes.

Targets

You need to sight in your shotgun just like doing your rifle because it has a tight choke. I use Birchwood Casey turkey targets.

Other gear

As you can see, to be successful you need some specific gear. To carry all of this gear you’ll need a Scent Blocker’s Thunder Chicken Turkey Vest. It has more than 15 pockets to carry your calls, a back pouch you can stuff decoys into (and use bungee cords to strap on more), a detachable pad to set on while calling and an orange safety flag you can pull out on back. I’m not known as Mr. Safety but be careful; I think more turkey hunters get shot than in any other shooting sport.

And lastly, check out the Ameristep Throwdown blind. It’s light weight and compact. Have fun!

Tom Claycomb lives in Idaho and has outdoors columns in newspapers in Alaska, Idaho, Utah, Nevada, Colorado and Louisiana.

Making turkey stew out of your wild turkey

This recipe will work for your wild turkey or a store bought turkey. I’m not a big soup and stew kind of guy, but as I get older, I do find myself eating more of both of them. Especially when it is cold outside. But today I want to share a recipe that I came up with a few years back that my family really enjoys, and that is turkey stew.

Turkey stew is super easy to make but unbelievably good. The backbone of the stew will be the bones and fat left over after you eat your smoked turkey. I came up with this recipe years ago after we had finished eating a smoked turkey that mom always sends us on Thanksgiving. She sends us a Greenberg smoked turkey, which is out of Tyler, Texas. Greenberg makes the best smoked turkey I’ve ever tasted. One year after we had polished one off, I hated to throw away any precious meat left on the bones and thought “Hmmm, I’m going to make some stew out of the leftovers.” It’s an every year event now.

You can make this turkey stew out of a Greenberg smoked turkey or out of you own smoked wild turkey. The ones from Greenberg come in a plastic bag stuffed in a paper sack. I put all of the bones and skin (fat) in the plastic bag and store in the freezer until I’m ready to cook it.

So here’s how to make the stew. It is best in a Lodge Dutch oven. Put 4 to 6 inches of water in the Dutch oven and heat it up on your stove top, or I guess you could do it in your oven. Right when you start heating the water I put in the ingredients. I throw the bones and fat in then. Since we love the stew so much, I make two batches out of one set of turkey bones.

Next you’ll put in the following ingredients:

  • Chopped potatoes (4 small ones)
  • One chopped squash
  • One chopped onion
  • 1-2 teaspoons of chopped garlic. I use bottled garlic.
  • Half a bundle of chopped cilantro. Cilantro is what makes the stew so don’t leave it out.
  • Tony Chachere’s seasoning and a little salt and pepper.

Bring all of the above ingredients to a boil. When the potatoes are done, throw in ¾ cup of instant rice. Let it cook for 5 to 10 minutes and you are now ready to serve. I scoop out everything with a big spoon and put in the bowls, leg bones and all. (I semi-separate the bones before cooking so all of the flavor is absorbed while cooking). Then we have a plate on the table to put the bones after you have eaten all the meat off of them.

This sounds like a simple recipe, and that’s because it is. But don’t let it fool you. It will be the best turkey stew that you’ve ever had. So just because you’ve sliced every last ounce off of your smoked wild turkey this spring don’t think it’s over. No sir, whip out a steaming pot of turkey stew and impress everyone. It is also great with homemade sourdough bread, but that will be another article down the road.

Tom Claycomb lives in Idaho and has outdoors columns in newspapers in Alaska, Idaho, Utah, Nevada, Colorado and Louisiana.

Your first handgun

Buying a handgun is a very personal decision. What you ultimately decide to get will depend on cost, caliber, what you want one for, how much recoil you can stand, which handguns fit your hand, and whether you prefer a revolver or a semi-automatic. Don’t go into the gun store without at least a basic idea of what you are looking for or you may be overwhelmed by all the options.

Several weeks ago, I was approached by a friend and asked what handgun I would suggest he get for home defense that everyone in the family could be taught to operate effectively. I’m as opinionated as anyone I know on this issue, but having been a Texas DPS Concealed Handgun Instructor for several years, I knew that my opinions might not be the right answer for my friend and his family. So I sat down with him and asked him a few questions to get a feel for why he wanted a handgun for protection of his family and we discussed pros and cons of revolvers, semi-automatic handguns, calibers, recoil and training suggestions.

With the information he received from me, he decided that a revolver would suit his needs better than a semi-automatic pistol. Once he made that decision, I made my first suggestion that he not buy a snub-nosed revolver, but choose at least a mid-size frame revolver. He is now considering whether he wants the revolver to shoot .38 special only or whether he would like the option of being able to shoot .357 Magnum cartridges also, and what manufacture’s mid-size revolver he likes best. So far, he hasn’t been to the gun store, but he has a pretty good idea what he is looking for.

On another occasion, I had made arrangements for my Texas Concealed Carry class to meet at the range for the qualification shooting portion of the course. I got there a little early and noticed two of my students, a man and wife, shooting at one end of the firing line. The woman who was about as tall as I am was having trouble with a small .380 Auto Colt Pistol. The little pistol was too small for her hand and she kept shooting high and I knew she was going to fail the shooting qualification with that pistol. Her husband on the other hand was shooting one ragged hole dead center in the target with a Kimber Custom 1911 pistol in .45 Auto Colt Pistol caliber. I asked the husband to let me see his 1911, and then handed it to his wife who could hold her husband’s pistol more comfortably than her own, and she proceeded to shoot almost as good a group as her husband did. They both used that 1911 to qualify and at the end of the session she made my day by asking her husband why he said she couldn’t shoot a .45? She made him drive her to their favorite gun store and she bought a Kimber Custom .45 just like the one he had.

Choosing a handgun for self defense should be more than buying a gun and putting it somewhere until you think you need it. Even if your state doesn’t require you to demonstrate proficiency and a knowledge of applicable laws, it is your responsibility to develop those skills and knowledge.

When purchasing a handgun for shooting fun at the range or back country travel the priorities that are important can be a little different than for concealed carry or home defense. You may want a handgun in a caliber such as a .22 Rimfire that has very little recoil and the whole family can enjoy and learn to operate safely and competently. On the other hand, for backcountry travel, you may be willing to accept some recoil and a larger caliber as long the adults and older children can shoot it safely and competently.

For backcountry travel I personally like a ruggedly built Ruger single-action revolver in .44 Magnum, which does recoil pretty hard, or a Ruger .45 Colt, which my older children loved to shoot as they were growing up because the recoil was very tolerable and not intimidating, while still hitting hard enough for a back country handgun.

Many of my friends prefer double action revolvers in .357 Magnum caliber, or 10 mm in a semi-auto pistol.

Just make sure everyone knows the rules of firearm safety. Treat all guns as if they are loaded, always keep guns pointed in a safe direction, keep your finger off the trigger until you are ready to shoot, and be aware of your target and what is beyond it.

Smokey Merkley was raised in Idaho and has been hunting since he was 10 years old. He can be contacted at mokeydo41245@hotmail.com.

Long-range hunting mistakes

Long-range hunting is attracting more and more people each year. I’m not talking about shooting deer or elk at anywhere near 1,000 yards. I wanted to discuss mistakes hunters make out to 500 or 600 yards

Truthfully, the maximum effective range, or the distance at which a hunter can consistently place shots in the vital zone, varies with each hunter, even when the equipment is similar.

Despite what some people will tell you, you can’t buy your way into making accurate shots from 500 to 700 yards. Making shots at that distance requires more than buying the top-of-the-line rifle from Remington, Winchester, Weatherby, Savage, Holland and Holland, Merkle, or any other brand you prefer. It takes skill.

Consider wind drift on a Remington Core-Lokt, .30-06, 180-grain bullet with a muzzle velocity of 2,650 feet per second, and a ballistic coefficient of .452. At 200 yards, the wind drift on that bullet in a 10 mph crosswind would be under 3 inches. Probably not enough to take you out of the vital zone. But if you don’t account for that wind drift at 600 yards, the bullet will have moved almost 30 inches. Well out of the kill zone.

Flinch can move the shot off by 10 inches, and something as unnoticeable as an angled trigger pull can make what would have still been a lethal shot at 300 yards into an all day tracking job at 600 yards.

Fortunately, rifles, optics, range finders and ammo are better than they were 20 or 30 years ago, but the hunter must do his part by developing the skill to keep the rifle as still as possible while getting the shot off.

Many shooting instructors tell their students to concentrate on the front sight or crosshairs of a telescopic sight and squeeze until the trigger breaks and the shot surprises them. That is the standard advice for target shooters, but it amounts to a negligent discharge. If you are a hunter, you need to be able to get the shot off when you want it to go off without moving the sights off target or your opportunity may be lost.

What do you focus on when you have a game animal in your sights? Most people if they answered that question truthfully would say the target. You can only focus on one thing at a time over distance so you should focus on the front sight or the crosshairs in a telescopic sight.

By focusing on the front sight or crosshairs, you can more easily see how much your rifle is moving and can tame it by adjusting your position and letting the front sight or crosshairs rest right on or a little above the vital area, where you want them to rest with minimal movement.

There is also an idea among many that a fast second shot begins with pulling the bolt back quickly and forcefully, ejecting the spent cartridge case and shoving the bolt forward picking up a new cartridge, loading it into the chamber and locking the bolt down behind it. Such a forceful cycling of the bolt is a mistake because it moves the rifle off target and forces the shooter to re-position his face and upper body. Instead, the bolt should be pulled back and pushed forward smoothly without disrupting body position or sight picture. You will find that it is actually faster than being in a hurry.

Breath control is vital to good long range accuracy, but only if you know how to hold your breath properly. You should inhale and exhale thoroughly, then cease exhaling as you see the crosshairs settling down, centered on the target. If you can’t make the shot in 5 to 10 seconds, the time you start to shift your focus because of a lack of oxygen, you need to break off the target, breath again, regroup and refocus.

Serious long-range hunters need to pay strict attention to their scope mount. In many cases, scopes are simply dropped in the rings, screwed down tight, and that is it. For shots at 100 to 150 yards that might not be a problem. However, if you are taking shots at 500 to 600 yards and sometimes more you need to be absolutely sure your scope is leveled with the action. This doesn’t take much time, a simple plumb line with a weight attached will work, but there are companies that make inexpensive scope leveling devices that fit in your pocket.

There are many hunters that believe that the solution to any problem is better equipment. Admittedly I am an advocate of the best equipment I can afford. My choice for a long-range hunting rifle from the time I was in my mid-teens has been a .300 Weatherby Magnum, normally with 180-grain or 220-grain Spire Point with boat tail bullets, with a ballistic coefficient of .425 and .481 respectively. My back-up rifle for long range shooting is an old Remington Model 721 in .30-06 with the previously mentioned 180 grain Core-Lokt bullet with a ballistic coefficient of .425.

However, the equipment that any of us buy, no matter whether top of the line or simply very good equipment, is handicapped by the ability of the shooter.

I think what I have discussed here are the first things we all must work on to have success in long-range hunting. There are great rifles, better optics than before, flatter shooting cartridges, even flatter than the .300 Weatherby if one really wants to go with the newer .30-378 Weatherby Magnum. But the reality is that we are our own worst handicap when it comes to long-range hunting. Our ability as riflemen can make top of the line equipment look pretty bad, or an old Remington Model 721, .30-06 built in the late 1940s seem like the greatest rifle ever built.

Smokey Merkley was raised in Idaho and has been hunting since he was 10 years old. He can be contacted at mokeydo41245@hotmail.com.

How to properly clean your optics

If you wear glasses, I’m sure that every time you buy a new pair the optometrist cautions you to only clean them with a soft lens rag. I always brushed aside their cautions. When you’re out four-wheeling, hunting or backpacking who has time for all of that detailed kind of work? For years I’d spit on my glasses and rub them clean with toilet paper, paper towel or whatever. I’d also brushed aside the cautions of only cleaning my optics with a soft rag. I’d clean them the same way.

Then one year (not that many years ago) I bought a new pair of glasses and of course received the same cleaning instructions. For some reason, I made the decision to actually commit to religiously cleaning my glasses with a lens rag or at worst a cotton cloth.

I cleaned my glasses properly for six to eight months and suddenly one day it struck me. Wow! This really works. I didn’t have one scratch on my lenses. Maybe there really was something to this old wives’ tale.

Then the next year I went on Pro-staff with Leica and right before I was about to conduct a “Glassing for Big Game” seminar in Dallas at the Dallas Safari Club Convention, I dropped by the Leica booth to get some optics to demo in the seminar (this saved me from flying down with a suitcase full of optics).

While at their booth, I was talking to Hamilton Boykin about various glassing techniques, and the topic of properly cleaning your glass popped up. His advice carried my cleaning knowledge to a new level. I’ll share with you some of his insights.

I’m going to describe how to properly clean the lenses on your binoculars, but the same principles apply to cleaning your scopes, spotting scopes and, yes, even your glasses. He said the first thing to do is to hold your binoculars upside down and blow any loose sand and dust off.

Next pour water on the lenses and again turn them upside down and hopefully more of the dirt pours off. I used to worry about pouring water on my binoculars. What if they leaked and I got moisture into them? Well, if they leak, they’re not very good binoculars anyway. Good ones shouldn’t leak.

I think most of us, even if we use a lens rag, rub the lenses to clean them. Because the lenses are small and circular, we end up rubbing them clean in a circular motion. He cautions against this. If we do this, he says we are grinding the sand into the lenses. He says we should use a brushing motion to brush off the dirt.

I then repeat this process once or twice before actually trying to rub the lenses clean. I don’t think you can be too gentle.

A few other tips. I have a buddy that carries a lens rag attached to his binoculars, but it is hanging out of the cover. This means that it is always full of dust and acts like a piece of sandpaper. Not good. I understand, if it isn’t attached to your binoculars then you’ll probably forget to carry it while hunting, but at least leave it tucked up in the small carrying bag and rinse it clean periodically.

If you’re out hunting and forget a lens rag what do you do? At worst, you can pull out the tail of your T-shirt and use it. The upper part of your T-shirt will be dusty, but hopefully the lower part will be dust-free.

I know, many of you are saying that most glass comes with lenses covers and, yes, that is true, but I have lost all of the million trillion lens covers I have ever owned within a hot second of getting out of the truck. Either I am not lens-cover compatible, or they just aren’t that functional in the real world.

I just went on Pro-staff with Riton Optics, and while typing I thought I’d check. Sure enough, I’ve already lost the top covers on my binoculars but the bottom ones are still on. I think I’ll call Riton and get another set and tie them on with a string so I don’t lose them. No doubt, covers help minimize your lenses getting dirty, especially on top.

As we close, if you buy a good set of optics like from Riton Optics and clean properly, the coating on the lenses should remain undamaged and you’ll be using them hopefully the rest of your life. Take care of your lenses. There is a lot of beauty out there to be seen if you have a pair of unscratched lenses!

Tom Claycomb lives in Idaho and has outdoors columns in newspapers in Alaska, Idaho, Utah, Nevada, Colorado and Louisiana.

The ASP XT DF flashlight

I suppose that I am no different than any other outdoorsman in that I count a flashlight as a vital part of my gear. And, like you, I am always looking for a more powerful, compact, rechargeable flashlight. At the SHOT Show this year I discovered the ASP XT DF flashlight (Armament Systems & Procedures XT Duel Fuel), which is going to become my go-to flashlight. Having a dysfunctional flashlight in a crisis can be life threatening, whether you have a bear come into camp at night, are packing out in the dark or broke down and working on your truck.

I remember once my buddy Shawn Lee had packed our elk camp into the Frank Church River of No Return Wilderness Area on his pack string. I couldn’t make it until a day later so I took off after work and got to the trail head after dark, loaded the rest of my gear in my backpack and took off down the narrow trail.

Not far down the trail, my main flashlight broke and I ended up hiking the last three miles with the aid of only a little rinky-dink light. Not fun in bear, wolf, cougar and moose country. Much less while trying to not tumble off the trail into the river below. The year before, we’d had two horses and a mule roll off in this same stretch.

As I’ve gotten older, I only use good flashlights. I could give a million more examples of disasters like above due to dysfunctional flashlights, but you get my drift, which is why I was excited to meet the ASP crew at the SHOT Show this year and get to test the ASP XT DF flashlight.

There are a few things I look for in a flashlight. Anymore, I like rechargeable lights. The better flashlights all seem to use expensive batteries nowadays, so you’ll go broke buying batteries if you use your flashlight much. Buy rechargeable ones. The ASP XT DF flashlight comes with four attachments that allow you charge it in your truck or at home in a wall socket. One is especially unique in that it is a retractable cord that helps keep it compact and prevents it from being a tangled mess like most of my cords become. And on top of this, the ASP XT DF flashlight comes with a canvas carrying case.

The ASP XT DF flashlight has five settings: max, high, medium, low and strobe. It runs on one 18650 battery or it can also run on two C1234A rechargeable batteries. It has two O-ring seals so it is water resistant.

It is the perfect-sized light for my standards. Not too big to be uncomfortable to carry but also not too small to be able to meet all of my needs.

If you’re like me and spend a lot of time in the backcountry, then I’d recommend buying a double set of the rechargeable C1234A batteries for backup. Or another option is to get a solar charging panel and carry it along. And, with the solar panel, you can also charge your GPS, camera and other electronic gear.

And one last feature that might interest a lot of you is that it also has a reversible pocket clip. In the ASP XT DF flashlight, you get a lot of quality and options packed into a small package for the MSRP of $160. Or you can go the cheap route like Indiana Jones and carry a torch and pray that the wind doesn’t kick up and blow it out.

Tom Claycomb lives in Idaho and has outdoors columns in newspapers in Alaska, Idaho, Utah, Nevada, Colorado and Louisiana.