Properly storing your rifle away

A lot of you are done hunting for the season but before you move on to ice fishing, drinking lattes or whatever you do until spring bear season hits, don’t forget to properly clean your rifle before you throw it in the gun safe.

If you properly clean your rifle it will last for generations, if not, you can destroy it in one year. Let me give you a good example of a bad example. One time I grabbed my 12-year-old nephew to take him deer hunting. We pulled his older brother’s rifle out of the closet for him to use. It WAS a nice rifle. But, the year before, the big brother had thrown it in the back of his truck in a hard case for the six-hour drive home through a pounding rain.

A year later when we pulled it out it was rusted up like a 125-year-old pirate ship on the bottom of the ocean. A top-notch rifle rusted up. OK, this may be a drastic example but you get my drift. Clean your rifle before you store it.

Here’s another reason to properly clean your rifle. If you aren’t able to obtain good groups, cleaning the fouling out of the barrel may help. I just got an Anderson Mfg. AR 5.56 and am tricking it out for the upcoming varmint season. I put on some Bowden Tactical after-market parts, a Riton Optics scope and got some good Nosler ammo. But that is all in vain if I don’t properly clean the rifle.

So how do you properly clean your rifle? Don’t be like my old buddy Roy that said you don’t have to clean smokeless rifles. And on the other extreme is my buddy Troy that goes over the top. I’m somewhat in the middle.

To begin, you’ll want to run a swab down the barrel soaked with a solvent. Years ago, everyone used Sweets 7.62 Solvent. Then there started leaking out rumors that if you didn’t properly remove all of the Sweets 7.62 that it could eat up your rifling. A buddy recommended that I switch to using Barnes CR-10.

After you run the swab down your barrel with the solvent then attach a cleaning brush (that matches the caliber of your rifle) and run it up and down your barrel to break loose the fouling. Then run a patch down the barrel to remove the fouling. Repeat until the patch comes out clean.

After you are done, I run a few patches soaked with Otis gun cleaning oil down the barrel to ensure that all of the solvent is removed and to oil the barrel so it doesn’t rust. The first shot after cleaning your gun won’t group as well so most serious shooters shoot one shot and then shoot their group.

If you’re cleaning a bolt action rifle, you’ll want to use a bore guide. Remove the bolt and slide in the bore guide and run the rod down the barrel from the back end. Here’s why. The last spot that the bullet touches before leaving the rifle is the crown. You don’t want to ding up the crown or it will harm your accuracy. That’s why rifles have recessed crowns to protect them. Of course on a semi auto you have no choice but to enter through the end of the barrel. And if you use a graphite or aluminum cleaning rod it shouldn’t matter. Don’t use a stainless-steel rod or you may harm your rifle.

Also clean the breach. I found something cool to help on this task. It’s called a Swab-Its which resembles an ear swab except that it has a foam tip. They offer various sizes. These are the best tools that I’ve found to clean tight to reach spots on my guns.

And, lastly, run an oiled patch over the outside of the rifle to put a thin layer of oil on it to protect the surface. You don’t have to soak it. Your rifle should now be good to store for the winter unless you’re like me and it is now varmint season. Off we go again!

Tools to help

Use a graphite or aluminum cleaning rod so you don’t damage your barrel. I just got a Real Avid graphite rod that I like.

As a kid I piled a stack of blankets on the kitchen table to hold my rifle for cleaning. It simplifies things to use a portable gun cleaning station which is a plastic box with forks on each end to hold your rifle steady while cleaning. It also has room to hold all of your cleaning supplies so they don’t get misplaced.

Use good gun oils. As far as I know Otis makes the best.

Merry Christmas!

Tom Claycomb lives in Idaho and has outdoors columns in newspapers in Alaska, Idaho, Utah, Nevada, Colorado and Louisiana. He also writes for various outdoors magazines and teaches outdoors seminars at stores like Cabela’s, Sportsman’s Warehouse and Bass Pro Shop. He can be reached via email at smileya7@aol.com.
Processing your own deer

A buddy shot his deer this morning and I’d told him if I was in town, I’d cut it up for him. I had an article written but the photos haven’t been approved yet. So I thought, you know, this would be a good topic to write about this week. So today we’re going to talk about what to do if you shoot a deer/elk/bear/moose/antelope and can’t get your truck to it.

To begin, let’s talk about what to do if you shoot an animal 5 miles back in the mountains. Or even a mile. If you have horses, then you’ll just need to quarter it out, throw the quarters in the panniers and hit the trail.

But let’s hold on a hot second. Whether you have horses or not, you still need to skin it first. The first 5 million animals I gutted I did the old traditional way. Make a cut up the midline and gut it out. But here’s another way you might try.

Don’t even gut your animal. Make a cut down the backline. While the animal is laying on its side, peel the skin down to the belly. Remove the forequarter. Then pull the backstrap and next the hindquarter. Then flip it over and repeat on the opposite side. This way you don’t even have to gut your animal.

To bone the animal, use a Knives of Alaska professional boning knife. Once every blue moon I’ll carry a small tarp to spread out and then I can lay the cuts on the tarp to keep them clean. If you don’t have a tarp, no biggie. Just lay 1 ½-inch thick limbs against a log and lay the cuts on the branches. That keeps them out of the dirt and let’s air blow over and under them and cool off.

It’s best to put the cuts into a canvas bag when you load them into your panniers (or really your backpack, too). Canvas keeps the cuts clean but the bag breathes. If you pack out your meat in plastic bags they will hold in the heat. I’ve done it numerous times but it’s best not to.

You’ve probably heard about aging meat. That will be a whole article in and of itself. Basically, aging is controlled rotting. No one likes to hear that description but it is semi true. So why would you age your meat? Aging makes the meat more tender and gives it a distinct taste that a lot of people like.

It is best to let the meat age on the carcass. But what if you’re in the backcountry and can’t haul out the whole animal? Or, even if you can haul it out, what if it is too warm? Then you have no choice but to bone it out.

So obviously you can’t always age your animal. Now for the kinker. If at all possible, it is best to at least let it go through rigor mortis. Here’s why. No matter what, the muscle sarcomeres are going to shrink up as it goes through rigor mortis, right? But with the ligaments attached to the bone it only allows them to shrink so much. But if you bone out your game hot, it will shrink let’s say two or three times more. This makes the meat tough. So, if at all possible, don’t bone it out for 18 hours after shooting it.

But, let’s say you shoot something on top of a mountain in bear/wolf country. You can’t leave it there overnight or they’ll eat it. So sometimes (a whole lot of times) you won’t have a choice but to bone it out hot. And it’s not the end of the world. I’ve boned out hundreds of deer hot. It’s just that it will be more tender if you don’t have to.

If you’re packing out on horses then you can quarter it out leaving it attached to the bone and pack it back to camp in quarters. You can even hang those quarters in a tree and let it age in camp. You may want to hang a tarp so the sun doesn’t warm it up during the day. Of course, if you’re backpacking it out, you’ll want to bone it out so you’re not packing out bones.

Well, we are out of room but if you want to know how to bone out your game and learn some unique cooking tips from Michael Scott (which is one of the top 15 chefs in America), check out “The High Road with Keith Warren” at highroadhunting.com. We did a three-part TV series on processing game.

Happy eating!

Tom Claycomb lives in Idaho and has outdoors columns in newspapers in Alaska, Idaho, Utah, Nevada, Colorado and Louisiana. He also writes for various outdoors magazines and teaches outdoors seminars at stores like Cabela’s, Sportsman’s Warehouse and Bass Pro Shop. He can be reached via email at smileya7@aol.com.
Christmas list for the outdoorsman

One fun thing about being an outdoor writer is that I get to test a lot of new gear. It amazes me how many new items come out every year. I have seminars at all of the big shows in January: the Dallas Safari Club Convention & Expo, the SHOT and the Safari Club International Convention in ‘Vegas. So of course, 99.999 percent of the manufacturers will be there displaying their new gear for 2022 as well as their old tried and true products.

If you just met an outdoorsman/woman and don’t know what to buy them for Christmas, don’t panic, Santa’s little helper is here to help you out. In some ways, outdoorsmen are easy to buy for. We love our gear. And if we just had the latest greatest item, we’re convinced that we will finally be successful. BUT — it does have to be the exact item or you might as well burn your money and give them a bag of rocks because it will have the same effect.

But the good news is, you don’t necessarily have to spend a bundle to light up their eyes. Everyone has a budget. So I will list some economical gifts on up to the blow-their-socks-off items. So with the above said, here are some items that tested out well for me over 2021 or items that have stood the test of time.

— Fishing lures. Make sure you get the exact ones/colors that he prefers.

— Browning Hiking socks. Great for hunting, fishing, backpacking or hiking.

— 5.11 tactical pants. Katy and I both love these. They’re nice looking, durable and functional.

— XGO base layers.

— Axil electronic hearing protection.

— Smith’s knife sharpening gear. I use their fine diamond stones. They’re the best.

— Smith’s electric knife sharpener for the kitchen.

— Otis Lead Free Wipes.

— Flashlight — the ASP Dual Fuel Raptor.

— Hi Mountain Seasoning — they make awesome jerky and sausage seasoning packs. The best on the market.

— Real Avid cleaning rods.

— Caldwell Sandbags.

— Trulock shotgun chokes.

— Alps Mountaineering Taurus 2 tent, Blaze +20 sleeping bag, Nimble air mat and Dash backpacking chair.

— Versacarry holsters.

— Boyds’ Gunstocks, they make some cool wood stocks.

— Blackfire Clamplights, great for working on your truck in the dark or in camp while backpacking.

— Chard Jerky Gun.

KNIVES

— Knives of Alaska Professional Boning Knife.

— KOA Elk Hunter.

— If you want some economical folders, check out the line up from Smith’s Consumer Products.

— For a nice kitchen set check out the Smith’s Cabin and Lodge Cutlery Set.

— Spyderco Counter Pups, great kitchen knives.

— Benchmade Claymore, nice assisted opening knife.

ULTIMATE GIFTS

If you want to cut to the chaff and blow him/her out of the water here are the ticket items.

— Mantis X10 Elite Shooting Performance System. The Mantis X10 is a great tool to help you become a better shot.

— Diamond Blade Knives. They have too many cool ones to list but check out their Summit, Heritage or Surge knives. DB has won numerous awards.

— AR: Who doesn’t love an AR? For an economical AR check out the Anderson Mfg. AM-15, M-LOK, 5.56.

Henry’s lever actions. How can you not love lever actions? Check out their .22, .22 mag, 30-30 and 45-70. All super cool!

— Airguns are super popular. Check out the Umarex Synergis or the Umarex .25 cal. Gauntlet. Love these guns or another fun one is the Umarex Steel Force BB gun. It shoots 6-round bursts.

— Boots. I love the Danner Recurve Moc Toe and my daughter likes the La Crosse Lodestar.

— Caldwell Stable Table and Hydro Sled.

— 5.11 Atmos Warming Jacket.

— Riton Optics 10×42 binoculars and their 3-9×40 or 4-16×44 scopes.

STOCKING STUFFERS

Here’s where you can impress them with little economical items that they’ll love.

— Flies. I get them cheap from flydealflies.com.

— Adventure Medical Kits first aid gear. This is the gear I use.

— JSB pellets for their airguns.

— Aquimira filtered water bottles.

— Mountain House backpacking meals (these are almost gourmet!).

— Ammo: Very specific what caliber, manufacturer and grain he shoots. Testing some Nosler ammo right now.

— Mister Twister plastics and jigs.

— Pautzke Fireballs.

— Swab-Its cleaning gun cleaning swabs.

— Clamtainers, plastic ammo containers. Great for flying.

— Talon Snap pistol cleaning kit.

— Freedom Baby ABC, an outdoors ABC book for kids learning their alphabet.

— IOU that you’ll go fishing/hunting with him. This will be the best gift you could give him.

Tom Claycomb lives in Idaho and has outdoors columns in newspapers in Alaska, Idaho, Utah, Nevada, Colorado and Louisiana. He also writes for various outdoors magazines and teaches outdoors seminars at stores like Cabela’s, Sportsman’s Warehouse and Bass Pro Shop. He can be reached via email at smileya7@aol.com.
The many different ways of cooking pheasants

I titled this article cooking pheasants but really it will apply to not only pheasants but also turkey and grouse. If you read my articles then you know that two weeks ago that I was in South Dakota pheasant hunting. I didn’t want to use the same ol,’ same ol’ cook-in-a-crockpot-with-mushroom-soup recipe so I thought I’d try something different.

When I boned them out, I pulled the breast and cut off the legs and bagged each separately. As a side tip, if you’re flying with meat, you don’t have to use a cooler. I usually wrap the bag of meat in clothes in my luggage and they stay frozen fine. It was no different this time. I threw them in my luggage at 2 and when I got home at midnight they were still frozen. In fact, the next afternoon when I pulled them out of the fridge to cook, they were still crusty.

Let’s start with the breast. I laid them on a cutting board and used a thick bladed Smith’s knife to slice them into thin strips. Cut them cross grain. I then laid them out and sprinkled them with the Hi Mountain Apple Blend Turkey Jerky seasoning. I then flipped the slices and seasoned the other side and then put them in a bag and squeezed the air out.

I like to season my jerky and marinate my meat in a plastic bag. That way every few hours I can flip the bag over and gently massage it for a couple of seconds and be ensured that it is getting evenly marinated.

I let it marinate for nearly 24 hours and then pulled it out and slapped it on my jerky air dryer. It dries unevenly due to all of the slices not being cut uniformly as well as the tray on bottom dries faster than the top trays. I’ll rotate the trays every hour or two and be watching for any small pieces that are done.

As they finish, I pull them off. Once again, I was reminded that Hi Mountain makes the best jerky and sausage seasoning in the world. This batch isn’t going to last long.

Now for the legs. I put them in a bag and poured in a bottle of Tony Chachere’s 30-minute Chicken Marinade. I also threw in a dash of Raspberry Vinaigrette dressing and pressed out the air and put in the fridge to season overnight.

The next day I put them on my Camp Chef pellet grill on high smoke, which is high smoke but low heat. Then I had to run over and pick up an Anderson Mfg. 5.56 that I had ordered. I have some Bowden Tactical after market parts and a Riton Optics scope that I’m going to trick it out with. I’ll be writing about that soon.

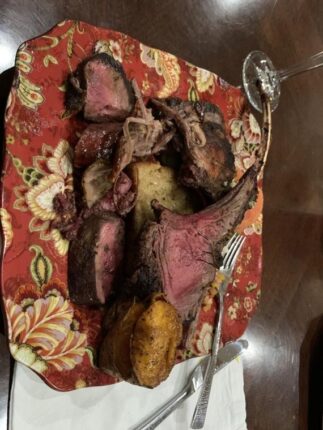
When I got home I pulled any jerky that was dried and turned up the heat on the smoker to get the legs ready for dinner. By now the legs were a golden brown and looked awesome. I only cook real potatoes and think instant potatoes are a communist plot but while shopping I had grabbed an instant pack of butter garlic instant potatoes. I cooked them and threw in some chopped onions and a spoonful of chopped garlic.

Kolby had a dozen tomatoes left over from the season that were on the edge. I made some homemade tomato soup which is easy. Cook the quartered tomatoes in a pan. When stewed put in a blender. Throw in a spoonful of chopped garlic and blend for a few seconds. Then return to the pan and throw in some chopped onions and chopped cilantro and a couple of cups of half & half or whole milk and stir.

We were now ready to eat like kings and queens. As you know if you’ve ever hunted pheasants, they’re the roadrunners of the game bird world. I don’t think that anything you do will keep them from being a little tough but gee, these had a great flavor and were great. We ate some more the next day for lunch after church.

So if you have a freezer of game birds you might want to try these methods on them. And yes, you can make jerky out of waterfowl.

I hope everyone has a Happy Thanksgiving and takes a minute to give thanks for living in the best country in the world and for your many blessings.

HAPPY THANKSGIVING.

Tom Claycomb lives in Idaho and has outdoors columns in newspapers in Alaska, Idaho, Utah, Nevada, Colorado and Louisiana. He also writes for various outdoors magazines and teaches outdoors seminars at stores like Cabela’s, Sportsman’s Warehouse and Bass Pro Shop. He can be reached via email at smileya7@aol.com.
Shooting clay pigeons

In last week’s article I lamented about how horrible I shot while pheasant hunting over in South Dakota. My self esteem was at rock bottom so when the young couple across the street asked if I wanted to go throw a few clay pigeons I said YES! Finally, a chance to redeem myself.

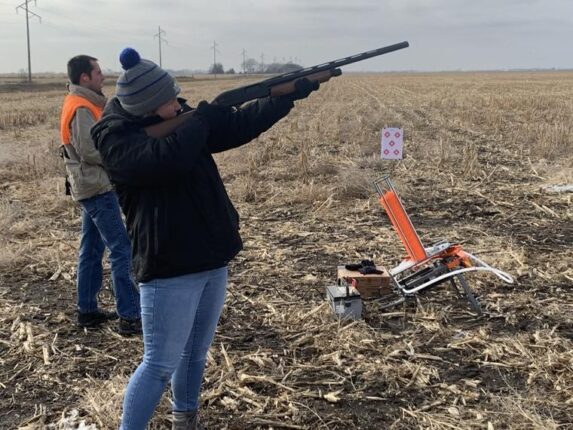
The next afternoon we loaded up the thrower, clay pigeons and the rest of the gear and headed out to the edge of town. We got things set up and Allen threw the birds while Audrey and I shot. I’ve never owned a good thrower but they had a Champion thrower that ran off of a deep cycle boat battery. I’ve got to check into one of those.

We took turns shooting and throwing and had a good time. I hit a few clays and built my confidence back up, which will save some counseling fees!

I’d taken some water bottles to blast and while Allan was unloading the gear, I threw one up for Audrey to shoot. She must have hit it dead center because I’ve never seen a bottle blow up that bad. It literally disintegrated. Vaporized. Ceased to exist. We looked and only found the cap screwed onto the neck and two other small fragments. Gee, I wish we had videoed it. She tried some more but never could mimic that shot.

After we got done shooting the shotguns then I pulled out the Umarex Steel Force which is a cool looking CO2 BB gun. It can fire six-round bursts. How cool is that! I had Allan throw a couple of clays and then he tried but we couldn’t quite hit a flying clay with it.

Then we had to shoot the 9mm. All of my life I’ve been a tight-wad so I normally just take a cardboard box and throw some dirt in it so it doesn’t blow off and then tape a target to it. This time though I’d taken a Caldwell Ultra-Portable Target Stand Kit. It is an awesome target holder for shooting with a pistol or I guess rifle, too, for that matter.

Ugh, my 9mm was now hitting about 4 to 6 inches to the right. Now I’m going to have to go back out again soon and figure out what’s wrong and get it sighted back in.

Then Allan wanted Audrey to shoot a few heavy pheasant loads so she’d be used to the kick when they go pheasant hunting next weekend. She shot a few and then Allan threw me a couple to try. What a gunsel, I’d forgotten my good Axil ear protection and only had foam ear plugs on me. Wow, the pheasant loads were a lot louder and my ears are still ringing.

Shooting clays is a blast and good practice to boot. If you want to start shooting clays and never have done so don’t panic. The gear is pretty simple. In the beginning I tried all of the hand throwers but they’re marginal at best. But you probably can’t afford one of the big commercial types of throwers, either. The Champion thrower that Allan and Audrey had looked like a good economical thrower.

You want to shoot pretty fast so you don’t want too tight of a choke. I was using a Trulock Dove choke which is .722 but I think next time I’ll use a Trulock Modified which is .720. For shells you’ll want some low base 7½- or 8- shot. The heavier waterfowl shells may be hard to find but you should be able to find some low base 7 ½- or 8-shot.

So, if you want to have a fun afternoon with the family, grab a box of clays and go dust a few. If the kids are too small, like 6 and under, you can set up some clays and let them break them with their BB or pellet guns.

After you get thinking that you’re pretty good, watch the Gould Bros. I met them in March in Alabama at the Shooting Sports Showcase and had dinner with them. I can’t even begin to tell you how great of shots that they are. Check out their shooting exhibition shows on YouTube. They’re unbelievable.

Wow, what if you could shoot like that?

Tom Claycomb lives in Idaho and has outdoors columns in newspapers in Alaska, Idaho, Utah, Nevada, Colorado and Louisiana. He also writes for various outdoors magazines and teaches outdoors seminars at stores like Cabela’s, Sportsman’s Warehouse and Bass Pro Shop. He can be reached via email at smileya7@aol.com.

Pheasant hunting in South Dakota

I used to pheasant hunt a lot of years ago but haven’t gotten to much in years. Years ago the pheasant hunting used to be phenomenal here in Idaho but those days are long gone. Subdivisions have taken over old pheasant haunts and big days are a distant memory.

I’m sure that there is still some good hunting to be had on some of the private farms around but I don’t have access to them and I see some hot spots once in a while. But not many. Years ago, an old timer was telling me about how many pheasants Idaho had back before my times and it sounded like it equaled South Dakota. Don’t you wish you could of seen that?

So, with the above said, I had a deal I had to do over in South Dakota last week. Why not throw in a shotgun while flying over? They have a unique license system. They don’t have a one-day or a year long license for out-of-staters. It cost $125 for a 10-day license and you can break it up into two five-day hunts. Since I was hunting the weekend I got a Saturday-Wednesday tag and I have another five days that I can hunt anytime for the rest of the year.

The first day was tough hunting. We were hunting public land and apparently they had been hunted pretty hard. We jumped quite a few birds but they were jumping 150 yards in front of us so it was tough.

The next day I went with another guy and we hunted some of his cousin’s land. Finally. We got into a lot of birds and probably not more than 15-20 jumped out of shooting range. I used to shoot a shotgun a lot. I’d start dove hunting Sept. 1, then grouse, then ducks, then pheasants until Jan. 15, so four and a half months hard every year. Now, ha, I barely shoot a shotgun at all as compared to used to and my shooting shows it.

To hunt, Ben had me park at one end of a railroad track and he took us up to the other end. That way, we could walk a mile, jump in the truck, grab the other truck and then hit another spot. The first half mile was a little slow and then it lighted up. We should have had our limits the first hour but it took us about two.

There were soybeans or corn on each side of the tracks which were lined with tall thick grass. At first it seemed like they were all on Ben’s side of the tracks. He about stepped on a couple. The further we got the better the hunting got. Despite our shooting, by the time we’d walked a mile to the end truck we were within two birds of our limit. We then jumped over to a nearby creek that was also lined with corn and soybeans. Halfway down we had our limits.

Wow, I’d forgotten how beautiful pheasants were. Their plumage is indescribable. It’s a miracle that they can stay live in the wild as bright as they are. But … they are tough birds and hard to knock down for keeps. And if they take off running, they make a road runner look like an overweight bald old man jogging.

Here’s the gear I’d recommend:

1. I’d recommend a 3” 12 ga. But I’ve shot pickup loads of pheasants with a 20 ga. Double barrel and boatloads with a 2 ¾-inch 12 ga.

2. Chokes — You’ll probably want a “Modified” early in the season when they’re holding tighter (maybe even an “Improved Cylinder”) and then later in the season switch to a full choke when they’re flushing wild. I about panicked. I arrived in South Dakota and remembered that I’d forgotten my chokes and only had in a dove choke. I called Trulock (which is the chokes I shoot) and they overnighted me a Modified and a Full choke. Lifesaver.

3. Not every year but frequently enough someone is going to have a shotgun that is gummed up and not cycling. That’s the kiss of death. I’d recommend carrying a bottle of gun oil/spray and some Swab-It cleaning swabs. They’re like an ear swab except that they have a foam pad on the end and are great for cleaning in hard-to-reach spots.

4. Don’t go to all the effort and expense to get in the position to have a good day of shooting and shoot cheap shells. Check out Kent Cartridge. They have a lot of offerings but early in the season you’ll probably want 6 shot and later when they’re flushing wild switch over to 4 shot.

5. How to cook them? I know, they taste like chicken but I’m going to try something different this year. I’m going to use some of the Hi Mountain Seasoning Turkey Jerky blends and make some pheasant jerky. I did that on a turkey once and it was unbelievable.

Good luck!

Tom Claycomb lives in Idaho and has outdoors columns in newspapers in Alaska, Idaho, Utah, Nevada, Colorado and Louisiana. He also writes for various outdoors magazines and teaches outdoors seminars at stores like Cabela’s, Sportsman’s Warehouse and Bass Pro Shop. He can be reached via email at smileya7@aol.com.

Become a better shot with a pistol

I’ve owned a pistol since I was in the seventh grade. You’d think that I’d be a decent shot with one but I’m not. Katy recently took a shooting class with Kerry LaFramboise that owns Watchmen’s Tactical Training and she went hog wild and got the shooting bug.

In the meantime, I was testing a Mantis X10 Elite Shooting Performance System. It is a great tool to help you learn how to shoot better. 

We stopped by Stockpile Defense to talk to Tim that knows quite a bit about the Mantis X10. In talking he asked me what method I used to shoot a pistol. I told him the push and pull method. He told me that worked but you have a tendency to pull your aim off towards your off hand and that he uses the crush method.

Let’s see if I can adequately explain this method of shooting. You grasp the pistol with both hands just like normal but instead of locking in your elbows you squeeze the pistol and push upward with your elbows, thereby causing a squeezing effect on your grip which is where the term crush comes from.

We then went out on the prairie and practiced shooting. Any time you try a new method/skill, your proficiency will drop at first but if it is indeed a better method then you will soon rise to a higher level than you had before.

I learned this truth years ago. I used to play a lot of volleyball (I never was any good but I played a lot). I could take a course at a local junior college for $18. We played for two hours and then had instruction for one hour. It was a great deal. I took the class probably three times. In fact, the college finally told me that I had to declare a major since all I’d taken was volleyball. I told them to cork it, I’d already done the college deal, I just wanted to learn how to play volleyball.

One night the instructor came in all excited. He had been to a camp and learned a new method to spike called the hammer spike. He told us that we had probably become proficient at how we currently spiked but if we’d learn how to do the hammer spike that we’d rise to a new level. At first our proficiency would drop but eventually we rose to a new level. I’ve found this bit of advice to apply when learning any new skill.

So, while Katy and I were shooting I started practicing the crush hold. I’m going to switch over and stick with this method.

Sometimes it’s fun to just got out and blast plastic bottles filled with water and have a good time. But I think when you shoot you actually ought to always practice and try to improve your skills. I don’t want to sound like some drill sergeant but we can’t ever think that we’ve reached the pinnacle. I think we always have to try to improve ourselves or else we flatline. I don’t want to say that you can’t ever retire and relax but … lol, maybe not, or you will become irrelevant.

My daughter went out shooting yesterday and came home and said, Daddy, I think I shot over 300 rounds today.” Wow, she, too, has gone overboard with her momma! I don’t have a clue where she’d get that from.

So I’m on a quest to finally become a decent shot with a pistol. Here’s my game plan. I left the Mantis X10 with Katy and am on a plane right now flying to South Dakota (hopefully have a pheasant hunting article coming up soon). I’ve got a Umarex CO2 BB pistol that I’m going to practice dry firing and also doing some live firing with.

I’ve got to do something. Katy smoked me when we went shooting. I’m scared to fly back home now!

Tom Claycomb lives in Idaho and has outdoors columns in newspapers in Alaska, Idaho, Utah, Nevada, Colorado and Louisiana. He also writes for various outdoors magazines and teaches outdoors seminars at stores like Cabela’s, Sportsman’s Warehouse and Bass Pro Shop. He can be reached via email at smileya7@aol.com.

Ford, Chevrolet, Toyota … they’re all the same. Get a horse.

I don’t want to be a hater but … I’ve had good and bad luck with nearly every make of truck out there. And if you ride a four-wheeler enough, it’s going to flip over on you someday. I’ve flipped a couple of times and neither time was any fun. The best that it has ever been was broken ribs and a messed-up shoulder.

So why not skip all the drama and go back to the original four-wheel drive vehicle — a horse! The above modes of transportation can go from reliable one day to dysfunctional the next. At least a horse is consistent. They’re always unpredictable!

There’s no sense of freedom like jumping on a horse and dragging a pack horse into the backcountry. It’s for sure a lot better than backpacking. When backpacking you’re limited to the gear that you can carry. When packing in on horses, you’re only limited by how many pack horses you have.

And while riding a horse you’re free to look around at the country. Sure, you have to watch the trail but even so, you can observe your surroundings more than when huffing and puffing while hiking. For instance, the other day my buddies Shawn and Orin Lee were out North of Arrowrock exercising the horses. Off to their left they noticed an eagle flying low. What was going on? He was zooming down and drilled a coyote. It rolled down the hill and finally got back on his feet and took out scrambling to get away. In a minute they noticed the same eagle knock another coyote flat across the canyon. Same scenario.

That would have been cool to see, wouldn’t it? And what a great film that would have made. I can’t believe an eagle was picking on a coyote, much less two of them. I’m going to have to get with Terry Rich that writes the “Just for The Birds” column and have him film something like this. That’ll liven up his morning walk through the neighborhood bird watching/dog walk!

You may not see that kind of action every trip but you sure aren’t going to see it if you stay at home. So, when Shawn called me and told me that he and Orin were going to run up to the mountains and exercise the horses to get them in shape for elk hunting and wanted to know if I wanted to go along, I said sure.

We are super blessed to live in Idaho. Even if you live in the middle of town, you can be up in some good country in one hour. For this trip we just ran a little ways up Highway 21. I’ve been to this spot before. For the first four miles you’ll be riding up semi-steep bald hills before you get up high to the forest. But still, I think that it is pretty country.

We were on a mission on this trip to exercise the horses but in a couple of canyons there are two old gold mines. I always like to explore around old mines. You look at the old foundations and try to figure out the layout of the structures. Which one was the bunk house and so forth? Then it’s always fun to climb back into the old mines. But, on this trip I just observed the old mines from up on the ridges above as we passed.

We finally made it up to the timber and hopped off the horses to let them (and us) rest for a minute. This trip I wasn’t very organized. Usually I’ll throw a coffee pot and a few links of bear sausage in my saddle bags. When we get up top I’ll build a little fire and heat up a cup of coffee. This time, all I had was water and three snicker bars. Shawn may not ask me to come along anymore if I don’t get it in gear from now on.

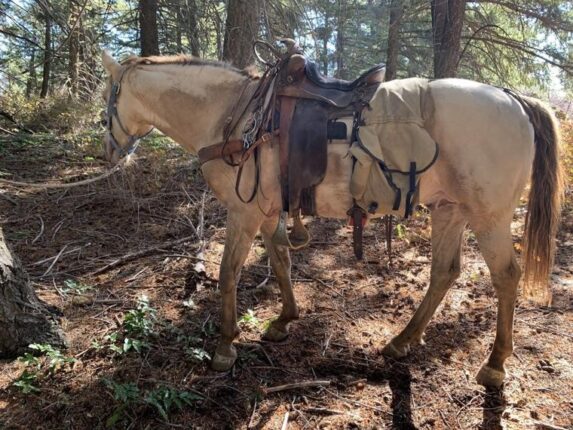
We rested a bit and then jumped back on the horses to head down. Normally when hiking, you always make it down one-third faster than it took to get up but on horses it’s even less because the horses are ready to get back to camp. Today though the horses were really ready and we made it in about half the time it took to get up on top. Suddenly, the out-of-shape horses were Olympic track stars. Rooster, the horse I was riding, jumped from the slacker dragging up near the rear to wanting to lead the string and be a pace setter.

I don’t want to be a whiner but I guess I’m out of shape. After that 8-mile ride in steep country I was glad we didn’t have another mile to go. Great day. So trade in your gas-burning truck and buy a horse.

Suddenly, the price of feed looks cheap compared to gas. And while a truck just sets there at home, your horse will be mowing the yard for you!

Tom Claycomb lives in Idaho and has outdoors columns in newspapers in Alaska, Idaho, Utah, Nevada, Colorado and Louisiana. He also writes for various outdoors magazines and teaches outdoors seminars at stores like Cabela’s, Sportsman’s Warehouse and Bass Pro Shop. He can be reached via email at smileya7@aol.com.

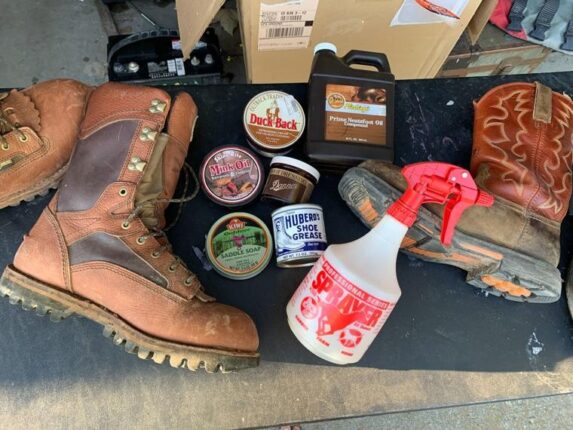
These boots are made for huntin’

Fifty years ago, I don’t think that writing this article would have been necessary. Everyone wore leather shoes or boots and knew how to take care of them. And come to think of it, there were a lot more leather products in general. Coats, belts, more car seats and furniture were made out of leather.

There were no four-wheelers so people rode horses and they had saddles and reins to oil up. And all reins and saddle bags were made of leather. Nowadays half of the belts are constructed of something other than leather, some reins and headstalls are braided out of nylon rope, and saddle bags are made out of Cordova or some kind of foreign material.

So now a lot of our outdoor/everyday items are made out of something other than leather.

With the above said, how to care for a good pair of leather boots is a foreign concept. Let’s cover that today.

As a kid, I didn’t have any money to spend, much less to blow on a good pair of boots. Plus, it seems a kid outgrows their footwear before they get out of the front door of the store, so why would you spend a couple of hundred dollars on a good pair of boots for a kid? Sure, years ago clothes got passed down but even then, there was no money to blow on expensive footwear.

But the older I get, the more I value a good pair of comfortable boots. If you are really particular, it is easy to spend $300 on up to $400 on a good pair of leather boots! (I only paid $325 for my first car in high school.)

But even if you only pay $150 a pair of boots, then you want to take care of them. If you do, then they will last for years and maybe even decades. I still have five or six pairs of my dad’s cowboy boots and he died in 1990.

So what’s the proper way to care for leather boots? What are the Bozo No No’s? What I’m going to say in this article will apply to your hunting boots as well as your work boots. The first thing to do is to not store them away wet. Let them dry out before storing them in the back of your closet. I’ve never owned one but they make boot dryers that air dry boots. Some people do this nightly on their work boots. It’d be nice to do this on an elk hunt when you’re stomping through snow everyday but not possible when camped in a tent on top of a mountain.

Years and years ago, dad told me that if you switched out wearing your boots every other day that they’d actually last three times longer instead of two times longer. I’ve found this to be true with my work boots. For work, I have a pair of Irish Setter Wingshooter boots and a pair of Cabela’s work boots, both of which are leather. Having two pairs of hunting boots to rotate not only extends the life of your boots but it also gives your feet a rest. Unfortunately, most people can barely afford one good pair boots, much less two.

On your work boots, it is way more comfortable if you wear a good boot pad like the Medi-Dyne Tuli’s Plantar Fasciitis Insoles. I thought it’d work to do the same on my hunting boots since we’re walking on rocks most of the day (hint — “Rocky Mountains”). I guess I only tried it once decades ago with some big sloppy boots, which made my feet slip around inside my boots, so I started wearing good hiking socks for padding when hunting (although I guess I tried this years ago with cheap boot pads, not the Tuli’s).

Now for the biggee. You want to keep your boots oiled up, which will help them last for years. But don’t oil them up when they’re wet or you’ll lock in moisture and the leather can’t absorb the oil.

Years ago, they came out with waterproof sprays. I just don’t think they are good for your leather so I recommend oils or good boot cremes — Like Neatsfoot Oil, Lexol, mink oil, etc. As a kid, we put Neatsfoot Oil on all of our leather products. Baseball gloves, saddles and everything, but no doubt, the oil can get on your Wranglers when riding. Not that many cowboys would care but now I use Lexol on my saddle. You can put Lexol in a bottle and spray it on and then rub it in.

To treat your boots, clean the mud and dirt off. Walking through tall grass will do this. Make sure that they are dry and then apply your oil and rub it in. If you’re a normal hunter, you’ll oil them up after each hunt before storing them. My work boots I oil up every weekend.

If you oil your boots up properly, you’ll start hearing comments like, “Hey, I met you on top of this ridge elk hunting 10 years ago, wow, and aren’t those the same pair of boots you had on then?”

Tom Claycomb lives in Idaho and has outdoors columns in newspapers in Alaska, Idaho, Utah, Nevada, Colorado and Louisiana. He also writes for various outdoors magazines and teaches outdoors seminars at stores like Cabela’s, Sportsman’s Warehouse and Bass Pro Shop. He can be reached via email at smileya7@aol.com.

She’s a college kid, yes — and an Alaska fishing guide

One thing I love about writing is some of the interesting people I get to meet. I don’t relish in meeting celebrities, most of them are too self-centered. As long as you know that your role is to worship them then it is all good but God forbid if you have something to say. But it is cool to meet someone that is a hero like Marcus Luttrell or Eugene Gutierrez.

Well, one of my favorist (I know that isn’t a word but this is my story) bosses ever, Doug Pageler, called me the other day and told me that he wanted me to meet his granddaughter-in-law (as Hailey would classify their relationship). I hadn’t seen Doug in a while so it’d be good to see him anyway so I said sure.

Upon meeting at the Hog Dog restaurant, Doug introduced me to Hailey Smith. She was an interesting interview. Her dad had her fly fishing at 7 years old, and by 15, she knew she knew she wanted to be a guide. At the ripe old age of 19, she moved to Montana and attended the prestigious Sweetwater Travel Company Guide School. I can only assume that she must have done an excellent job because seven days later she was guiding. While in Montana, she guided on the Yellowstone, Big Horn, Bitterroot and numerous other rivers.

After the season, she moved back to Idaho and enrolled in school at the University of Idaho. After a year, an old buddy called and told her she ought to come up to Alaska. He was guiding and they could use her. After repeated calls she finally signed up.

After a flurry of hustling, guide licenses, plane tickets etc., etc., were lined up and four days later she was enroute to the Last Frontier state. She arrived at the lodge and after a snack and warm greeting she was notified that her first guiding trip would begin at 5 a.m.

She had run many a river with her dad but she was now on her own. Suddenly it got real. It’s one thing to be running an Idaho river with dad being the captain and being on your own with one or two clients and rounding a bend in a raft and there’s a brown bear in the middle of his stream.

We all have dreamed of being a game warden, a guide or owning a big ranch, haven’t we? Well, let’s take a peek into the life of a guide and see what her schedule really looked like. Was it all fly fishing on pristine rivers and having a good time? Well, not quite.

She rolled out of bed at 5 a.m. (You know, before that little round thing in the sky called the sun even pops over the horizon.) She had to grab her 60-pound raft and strap it to the pontoon on the float plane. Then load up the pre-packed lunches, fly rods, life jackets and paddles. And the night before, depending on where they were going, the necessary flies for the day.

She didn’t say all of this but I’ve guided enough people to know how it plays out. Most clients are rich and used to having their way. They’ve spent a lot of money to get to your lodge. The weather had better be perfect, the fish biting and keep them from getting eaten by a bear.

All of my guides in Texas and most in Louisiana have fished right along beside us. They get to fish full time. Not so with an Alaskan guide. Hailey was busy paddling and getting the clients into position. A good guide is invaluable. They’ll put you in position for a good cast, they can read the river and tell you where to cast and how to work your fly. Guiding is hard work. Especially if you’re also paddling.

Then of course we had to swap a few bear stories, didn’t we? And she has a few. Once, she and a guide buddy were floating a river with some clients. He took the right fork so she took the left. There was good water. But as soon as she rounded the bend the water disappeared down to nothing and the raft bottomed out. To make matters worse there was a big brown bear in the middle of the river fishing.

She jumps out trying to dislodge the raft while the clients sat in the raft. She is sweeter than me. I think about that time I’d of informed them if they didn’t want to become a raft wrap taco, they’d better jump their happy little tails out of the raft and help me out. But they survived.

The bear stories all run together now that I’m sitting here pounding out this article on the keyboard but somewhere in the mix one charged within 10-feet and stood up looking at her and her clients. She did the whole stand up and look big bit but at about 5-foot-5 and 110 pounds soaking wet I doubt that she looked too intimidating but luckily, he finally dropped down and took off the other way.

Then lastly, I had to ask her the obvious question. Was it tough breaking into what is traditionally a man’s world? She said the other guides were all super helpful and supportive. Of course, if you read between the lines, she’s a go-getter and a smart young lady. What other 22-year-old kid has done all that she has? Not many.

What an interesting interview. Now, of course, we’re trying to line up a fishing trip.

Tom Claycomb lives in Idaho and has outdoors columns in newspapers in Alaska, Idaho, Utah, Nevada, Colorado and Louisiana. He also writes for various outdoors magazines and teaches outdoors seminars at stores like Cabela’s, Sportsman’s Warehouse and Bass Pro Shop. He can be reached via email at smileya7@aol.com.